How to Remove Nuna Car Seat Cover: Step-by-Step Guide
Getting a Nuna car seat cover off can feel tricky, especially if it’s your first time. Maybe your child spilled juice, or you just want to keep things fresh. Many parents worry about damaging the fabric or forgetting how to put it back. But you don’t need to stress. With the right steps and tips, you can remove the cover safely and easily—without needing special tools or professional help.
This guide walks you through every detail, from understanding your Nuna model to reattaching the cover correctly. Along the way, you’ll learn smart tricks that save time and keep your car seat looking new. Even if you’re not handy, you’ll feel confident by the end.
Understanding Your Nuna Car Seat Model
Before you start, it’s important to know which Nuna car seat you own. The process is a bit different for each model. Nuna’s most popular seats are the PIPA, RAVA, REVV, and EXEC. Most Nuna car seats have a similar cover-removal method, but some steps and button placements change.
Check the user manual that came with your seat. If you lost it, you can find your manual online by searching “Nuna [model] manual PDF. ” Knowing your model will help you avoid mistakes like pulling on the wrong part or snapping a hidden clip.
Key Differences By Model
Here’s a simple comparison of common Nuna car seat models and how their cover attachments differ:
| Model | Type | Main Attachments | Special Notes |
|---|---|---|---|
| PIPA | Infant | Snaps, elastic edges | Handle must be rotated |
| RAVA | Convertible | Elastic, hooks, Velcro | Backrest is tight-fitting |
| EXEC | All-in-one | Snaps, zippers, Velcro | Multiple recline positions |
| REVV | Rotating Convertible | Elastic, snap buttons | Must rotate seat for access |
Knowing these differences means you can spot where to look for fasteners or tight spots.
Why Remove The Nuna Car Seat Cover?
Most parents remove the cover for one of these reasons:
- Cleaning: Spills, crumbs, and dirt build up quickly.
- Odor: Fabrics can hold onto smells from food or sweat.
- Inspection: Checking for mold, pests, or wear.
- Replacement: If you want to use a new or different cover.
A clean cover isn’t just about looks—it keeps your child healthier by reducing allergens and bacteria.
Credit: www.dentalhousecr.com
What You’ll Need
You don’t need fancy gear. Gather these before you start:
- Your car seat manual
- Smartphone or camera (to take photos for reassembly)
- Mild soap (for washing later)
- Small flat tool (like a butter knife, if clips are stuck)
- Clean workspace
Having everything nearby avoids frustration later.
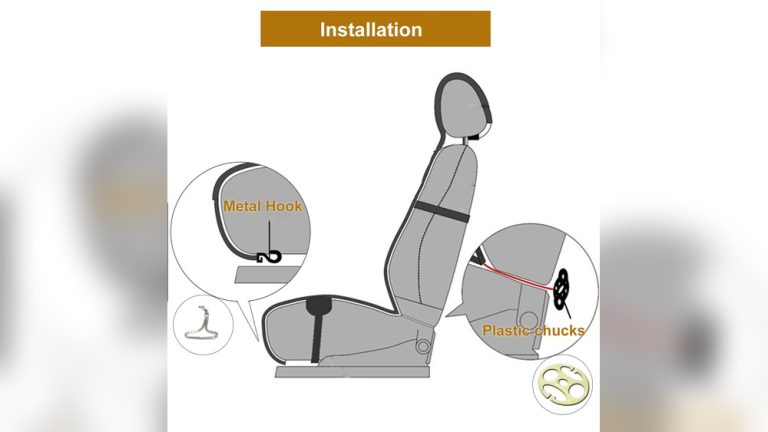
Preparing For Cover Removal
Start by making sure the car seat is not installed in your car. Removing the cover is much easier on a flat, stable surface like a kitchen floor or table. If your car seat is dirty, shake out loose crumbs first.
Take clear photos of each part before you remove it. This is a lifesaver when you need to put the cover back, especially for small details.
If the harness straps or buckles are removable, snap a photo of their path and how they connect. Some Nuna seats have a special threading that’s easy to forget.

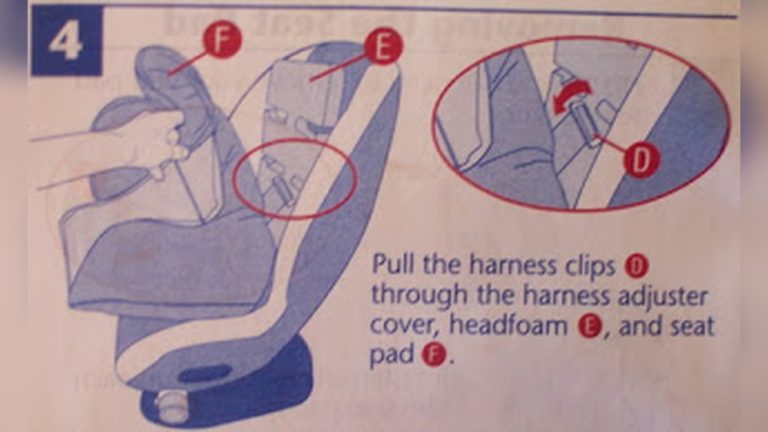
Credit: www.youtube.com
Step-by-step: How To Remove Nuna Car Seat Cover
The core process is similar for most Nuna seats, but always check your manual for special steps.
1. Release The Harness Straps
First, loosen the harness all the way. Some seats have a button at the front or side—press and pull the straps out. If your straps have covers, slide them off.
Many Nuna harnesses can stay attached while you remove the cover, but if your manual says to unthread them, do so now. Take a photo of the threading pattern.
2. Remove The Buckle
Press the red button and pull out the buckle. On some Nuna seats, you’ll need to slide the buckle through a slit in the cover. For others, unsnap the bottom fabric panel.
3. Detach Elastic Edges And Fasteners
Most Nuna covers are held on by elastic hems and sometimes snap buttons or Velcro. Work your fingers around the edge of the seat, gently pulling the elastic off the shell.
Check for hidden snaps or hooks under the seat or at the back. These are usually easy to release with your fingers. If you hit a stubborn spot, use a small flat tool to gently pry it loose—never force anything.
4. Unhook Shoulder And Backrest Sections
Once the base is loose, move to the backrest. Pull the cover up and over the top of the seat. Some Nuna models have the cover tucked under a plastic lip or attached with small hooks—feel for these and gently unhook.
If your seat reclines or rotates (like the REVV), you may need to adjust its position to reach all the fasteners.
5. Remove Headrest And Insert Sections
Many Nuna seats have a separate headrest insert and infant padding. Take these out—they often just lift free or are attached with Velcro.
6. Lift The Cover Off Completely
With all fasteners released, you can now lift the main cover off the shell. Move slowly so you don’t miss any clips or tabs.
If the cover feels stuck, double-check for missed snaps or elastic. Forcing it can tear the fabric or break a fastener.
7. Keep Small Parts Together
Place all removed fasteners, inserts, and covers in a clean pile or bag. This prevents losing anything important when you’re ready to reassemble.
Common Mistakes To Avoid
Many parents try to rush the process and end up frustrated. Here are mistakes to watch out for:
- Forgetting to take photos: You’ll likely forget how the harness threads back in.
- Pulling too hard: Forcing the fabric can rip it or break a clip.
- Missing hidden snaps: Nuna hides some fasteners for safety and looks.
- Losing small inserts: Infant inserts and harness pads are easy to misplace.
- Not checking the manual: Each model has its quirks—one wrong move can make reassembly tricky.
Washing And Caring For The Cover
Once the cover is off, check the label inside for washing instructions. Most Nuna covers are machine washable on gentle, but some need hand washing.
- Use mild detergent and cold water to protect the fabric.
- Never use bleach or harsh chemicals.
- Air dry only—never put Nuna covers in the dryer, as heat can shrink or warp the fabric.
If you have stubborn stains, gently scrub with a soft brush and extra soap. Avoid wringing or twisting the cover to keep its shape.
Reattaching The Nuna Car Seat Cover
Putting the cover back on can feel like a puzzle. But your photos and a little patience make it much simpler.
- Start with the headrest and insert sections, attaching any Velcro or snaps first.
- Fit the main cover over the shell, lining up the harness slots and buckle holes.
- Work the elastic edges and fasteners back into place, going around the seat’s edge.
- Re-thread the harness and buckle, following your photos for the correct pattern.
- Double-check all clips and snaps to make sure nothing is loose.
Test the harness and buckle by pulling on them firmly—there should be no slack or looseness.
Quick Reference Table: Cover Removal And Reattachment Steps
| Step | Action | Tip |
|---|---|---|
| 1 | Loosen harness and remove pads | Take a photo first |
| 2 | Remove buckle and inserts | Keep small parts together |
| 3 | Detach elastic and fasteners | Work slowly to avoid rips |
| 4 | Lift cover off shell | Check for missed snaps |
| 5 | Wash and air dry | Do not use dryer |
| 6 | Reattach cover and harness | Follow your photos |
Pro Tips For A Smooth Process
- Check for upgrades: Nuna sometimes changes cover designs with new versions. If you’re struggling, check for updated instructions on their official website.
- Use a lint roller: Before washing, roll over the cover to pick up hair and dust.
- Label small inserts: If you have more than one seat or child, label parts with painter’s tape.
- Dry flat, not hung: To prevent stretching, lay the cover on a towel to dry instead of hanging.
- Practice re-threading: Before you need the seat urgently, practice putting the harness back. This saves stress if you’re in a hurry later.
When Should You Replace The Cover?
If the cover has:
- Visible tears or holes
- Permanent stains or smells
- Broken fasteners
- Shrunken from improper washing
It’s time for a new one. Using a damaged cover can reduce the seat’s safety and comfort. Always buy genuine Nuna replacement covers for the best fit and safety guarantee.

Credit: www.youtube.com
How Often Should You Clean The Cover?
For most families, cleaning every 2 to 3 months is enough. If your child eats in the car seat or has allergies, consider cleaning monthly. After any major spill or sickness, remove and wash the cover as soon as possible.
Frequent cleaning keeps the seat fresh and extends the life of the fabric.
Why Photos Are Your Best Friend
Many parents skip taking photos, but this is the easiest way to avoid mistakes. Photos help you:
- Match harness threading exactly
- See where inserts and pads fit
- Remember which clips go where
If you ever get stuck, you can check your images instead of guessing.
Where To Get Replacement Manuals Or Covers
If you lose your manual or need a new cover, visit the Nuna official website. They offer downloadable manuals and genuine replacement parts. Avoid buying covers from unknown sellers, as they may not meet safety standards.
Frequently Asked Questions
How Long Does It Take To Remove A Nuna Car Seat Cover?
It usually takes 15 to 25 minutes for your first time. After you’ve done it once, you can finish in about 10 minutes. Extra time may be needed if the cover is very dirty or you need to take more photos.
Can I Wash The Nuna Car Seat Cover In A Washing Machine?
Yes, most Nuna covers are machine washable on a gentle cycle with cold water. Always check the label inside your cover for specific instructions. Never use bleach or tumble dry.
Do I Need Any Tools To Remove The Cover?
Usually, no tools are needed. Sometimes a small flat tool like a butter knife can help release a tight clip, but it’s not required for most models.
Will Removing The Cover Affect The Car Seat’s Safety?
No, as long as you put everything back correctly. Make sure all straps, buckles, and fasteners are reattached exactly as they were. Using photos helps ensure you don’t miss anything important.
What Should I Do If I Can’t Get The Cover Off?
Double-check your user manual and photos. Look for hidden snaps or elastic edges you may have missed. If you’re stuck, contact Nuna customer support or visit their website for help.
Taking off a Nuna car seat cover is a simple job when you know the steps. A little preparation and care go a long way. With this guide, you’ll keep your child’s seat clean, safe, and comfortable—without stress or guesswork.