How to Put Chicco Car Seat Cover Back on Easily and Correctly

Putting the cover back on a Chicco car seat can feel confusing, especially after cleaning it or swapping it out. Many parents struggle with this task because the covers are designed to fit tightly for safety, and each piece has its own place. If you’ve ever spent too long wrestling with straps and fabric, this guide will help you get the cover back on quickly and correctly. By following clear steps, you’ll avoid mistakes that could affect your child’s comfort or safety. Whether you have the Chicco KeyFit, NextFit, or MyFit, the basic process is similar. Let’s break it down so you can put your Chicco car seat cover back on without stress.
Why Proper Cover Installation Matters
A car seat cover does more than make the seat look good. It protects the seat’s foam from spills, keeps your child comfortable, and prevents the harness from getting tangled. Most importantly, a properly fitted cover ensures the seat’s safety features work as intended.
If the cover is not installed correctly, it can interfere with the harness or buckle, making the seat unsafe in a crash. In fact, according to the National Highway Traffic Safety Administration, about 46% of car seats are used incorrectly, often because of improper assembly.
Taking the time to install the cover correctly is not just about looks—it’s about safety.
Preparation: What You Need Before You Start
Before you begin, gather these items:
- Clean, dry cover: Make sure the cover is completely dry after washing.
- Car seat manual: If you have it, keep it nearby. You can also download it from the Chicco website.
- Car seat: Place it on a flat surface, like a table or floor.
- Harness and straps: Make sure all parts are present and untangled.
Check for any small pieces, such as padding inserts or shoulder pads. Missing parts can cause frustration later.
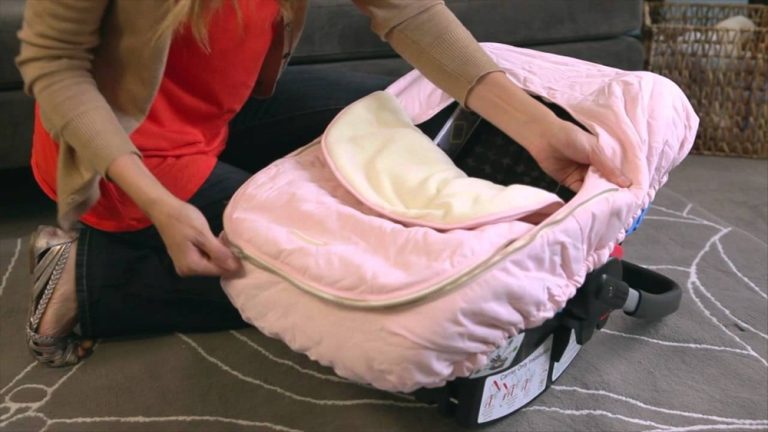
Credit: www.youtube.com
Step-by-step Guide To Putting The Cover Back On
1. Identify All Cover Parts
Chicco covers usually have several pieces:
- Main seat cover
- Headrest cover
- Harness covers
- Buckle pad
- Side padding (optional)
Lay them out so you can see everything. Some models have extra inserts for infants or toddlers; these must go back in the correct order.
2. Start With The Main Seat Cover
Place the main cover over the seat shell. Begin by aligning the top of the cover with the headrest area. Pull the cover down so it fits snugly over the seat’s contours.
Pro tip: The edges of the cover often have elastic or hooks. Make sure these fit around the plastic shell, not just the foam.
3. Thread The Harness And Buckle
Find the harness and buckle openings in the cover. Push the straps and buckle through these holes. Make sure the straps are not twisted.
If your seat has a split buckle (two parts), insert each part through its opening. For the harness, pull the shoulder straps up through the slots in the cover.
4. Attach The Headrest Cover
If your Chicco seat has a separate headrest cover, slide it over the headrest area. Some covers have snaps or Velcro; fasten these securely.
Check that the headrest cover does not block the harness slots. The harness should move freely.
5. Secure Side Padding And Inserts
Install any side padding or inserts. These often fit into pockets or attach with snaps. Make sure they are not loose.
Infant inserts should go in first if you are using them. For toddler seats, skip the infant insert.
6. Reattach Harness Covers And Buckle Pad
Slide the harness covers onto the shoulder straps. If your seat has a buckle pad, fit it around the crotch buckle.
Double-check that these pieces do not cover any harness adjustment buttons or levers.
7. Check All Fasteners
Many Chicco covers have elastic loops, hooks, or Velcro strips at the back and sides. Fasten these to the seat shell as shown in the manual.
If your seat has plastic tabs, push them into the slots on the shell. This keeps the cover from sliding.
8. Inspect For Proper Fit
Run your hand along the edges to make sure the cover is snug. The fabric should not be loose, bunched, or wrinkled.
Check all harness openings. The straps and buckle should move smoothly and not be blocked by the cover.
9. Test The Harness And Buckle
Pull the harness tight and try buckling and unbuckling it. Everything should work easily. If not, check for misaligned openings or trapped straps.
10. Install Any Additional Accessories
Add any cup holders, armrest covers, or other accessories. These usually snap or slide into place.
If your model has a removable canopy, attach it last. Make sure it does not interfere with the harness.
Practical Tips For Smooth Installation
- Work slowly: Rushing can cause mistakes, especially with the harness.
- Use bright lighting: Small slots and fasteners are easier to see.
- Check the manual: Each Chicco model has slightly different cover shapes and fasteners.
- Clean as you go: Wipe the seat shell before putting the cover back on.
Many parents skip these steps and struggle later. Taking a few extra minutes can save time and keep your child safer.
Common Mistakes And How To Avoid Them
Even experienced parents make errors when reinstalling covers. Here are some mistakes to watch out for:
- Twisting the harness straps: If the straps are twisted, the harness may not protect your child properly.
- Missing fasteners: Forgetting to attach hooks or elastic loops makes the cover slide or bunch up.
- Misplacing inserts: Putting infant inserts in toddler seats reduces comfort and can affect harness fit.
- Cover blocking harness slots: If the cover covers harness slots, the straps will not move freely.
- Loose fabric: Loose covers can bunch up and cause discomfort.
Always check your work before finishing.
Comparing Chicco Car Seat Models
Different Chicco models have slightly different cover designs. Here’s a quick comparison:
| Model | Cover Pieces | Fastener Type | Difficulty Level |
|---|---|---|---|
| KeyFit | 4-5 | Elastic, hooks | Easy |
| NextFit | 6-7 | Velcro, snaps | Moderate |
| MyFit | 7-8 | Tabs, elastic | Challenging |
The KeyFit cover is usually easiest to install. NextFit and MyFit have more pieces and fasteners, making the process a bit harder.

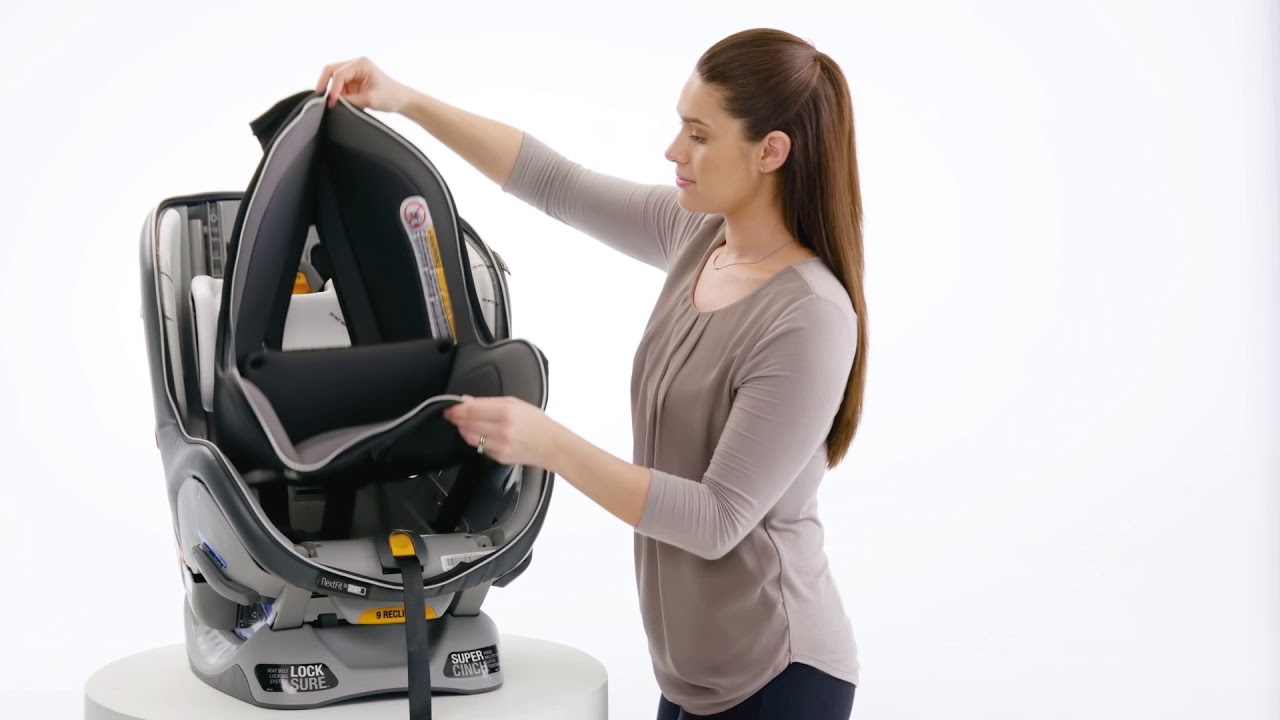
Credit: allurelakestorey.com
Step Differences For Keyfit, Nextfit, And Myfit
Some parents wonder if the steps change for each model. Here are a few examples:
| Step | KeyFit | NextFit | MyFit |
|---|---|---|---|
| Main Cover | Elastic edge | Velcro strips | Plastic tabs |
| Headrest | Integrated | Separate | Separate |
| Harness Covers | Slide-on | Snap-on | Snap-on |
| Inserts | 1 infant insert | 2 inserts | Multiple inserts |
Always check your model’s manual for exact instructions.
Safety Checks After Installation
After putting the cover back on, always do these checks:
- Harness movement: The straps should move smoothly.
- Buckle access: The buckle must be easy to reach and operate.
- Cover fit: The cover should be tight and not shift when you move it.
- No blocked slots: Harness and buckle openings should be clear.
If you notice anything wrong, remove the cover and start again. Never use the car seat if the cover is not installed properly.
Cleaning And Maintenance Tips
Keeping the cover clean extends its life and helps your child stay comfortable. Here are some tips:
- Wash with mild soap: Harsh detergents can damage the fabric.
- Air dry only: Machine drying can shrink the cover or damage elastic.
- Spot clean between washes: Use a damp cloth for small spills.
- Check for wear: Look for fraying or holes before reinstalling.
According to Chicco, covers should be washed every 1-2 months, or after big spills.
Troubleshooting: What If It Won’t Go On?
Sometimes the cover just won’t fit right, even after careful steps. Here’s what to check:
- Wrong orientation: Double-check which side is front and back.
- Missed fasteners: Look for hidden hooks or tabs.
- Shrunk cover: If the cover shrank during washing, gently stretch it before installing.
- Damaged parts: Torn elastic or broken snaps need repair or replacement.
If you are stuck, watch installation videos or contact Chicco customer service. Many parents find helpful guides at Chicco USA.

Credit: csftl.org
Real-world Examples
Anna, a mother of two, says she spent an hour trying to reinstall her NextFit cover before realizing she’d missed two elastic loops. After fixing this, the cover fit perfectly. Another parent, Mark, found that his cover wouldn’t stay tight until he pushed all the plastic tabs into their slots.
These small details make a big difference. Most problems are solved by checking the manual and looking for hidden fasteners.
Expert Advice For Difficult Models
Some Chicco models, like MyFit, have more complex covers. Here’s how to handle them:
- Take photos: Before removing the cover, take pictures of each step. This helps when putting it back on.
- Label pieces: Use sticky notes or tape to mark where each insert or pad goes.
- Ask for help: If you’re unsure, ask another adult to hold the seat while you work.
These tricks save time and reduce frustration.
Frequently Asked Questions
How Do I Know If The Cover Is Installed Correctly?
Check that all straps and buckles move freely, the cover is tight, and no openings are blocked. The seat should look smooth, with no loose fabric or bunching.
Can I Wash The Chicco Car Seat Cover In A Washing Machine?
Most Chicco covers are machine washable, but always check the label. Air dry to prevent shrinking and damage to elastic.
What Should I Do If I Lost A Fastener Or Tab?
Contact Chicco customer service for replacement parts. Using the seat without all fasteners is not safe.
Are All Chicco Covers Installed The Same Way?
No. Each model has unique cover shapes and fasteners. Always check your manual for specific instructions.
Where Can I Find Video Guides For Installation?
Visit the official Chicco website or YouTube. Search for your exact model for step-by-step video guides.
Putting your Chicco car seat cover back on is much easier with a clear process. Paying attention to small details and following the right steps keeps your child safe and comfortable. Take your time, double-check each piece, and don’t hesitate to use resources like manuals or online guides. With practice, you’ll get faster and more confident every time.