How to Put Cover Back on Car Seat: Easy Step-by-Step Guide
Putting the cover back on a car seat might sound easy, but if you’ve ever tried it, you know it can be tricky. Whether you washed your car seat covers or replaced them with new ones, the process demands care, patience, and sometimes a bit of muscle.
If you rush, you risk wrinkles, misalignment, or even damage to the cover or the seat itself. This guide breaks down the process into clear, simple steps. You’ll also learn how to avoid common mistakes and make sure the cover looks smooth and fits securely.
Many people overlook small details that make a big difference, like matching seams, securing hidden hooks, or choosing the right tools. By following these steps and tips, you can make your car’s interior look neat, comfortable, and even protect your seat’s value over time.
Understanding Your Car Seat And Cover
Before you begin, it helps to know the type of seat and cover you’re working with. Car seats come in various designs—bucket, bench, split-folding, and more. Covers can be universal or custom-fit, and each type needs a slightly different approach.
Universal covers are designed to fit many car models, but they may not be a perfect match for your seats. Custom-fit covers are made for specific makes and models, ensuring a closer fit and better appearance.
Common Car Seat Cover Materials
Most covers are made from:
- Fabric (polyester, cotton blends)
- Leather or faux leather
- Neoprene
- Vinyl
Each material stretches and secures differently. For example, leather covers are less flexible but look more luxurious, while fabric covers are easier to adjust.
Tools And Preparation
Getting the right tools ready saves time and reduces frustration. Here’s what you’ll likely need:
- Flathead screwdriver (for prying out plastic clips)
- Needle-nose pliers (for tightening hooks or loops)
- Soft brush or lint roller (to clean the seat before covering)
- Mild soap and water (for wiping dust or stains)
- Spray bottle with water (to help stretch covers)
- A friend (for help with larger bench seats)
Before starting, check your car’s manual for any special instructions. Some seats (especially with airbags) have covers that must be installed in a specific way.
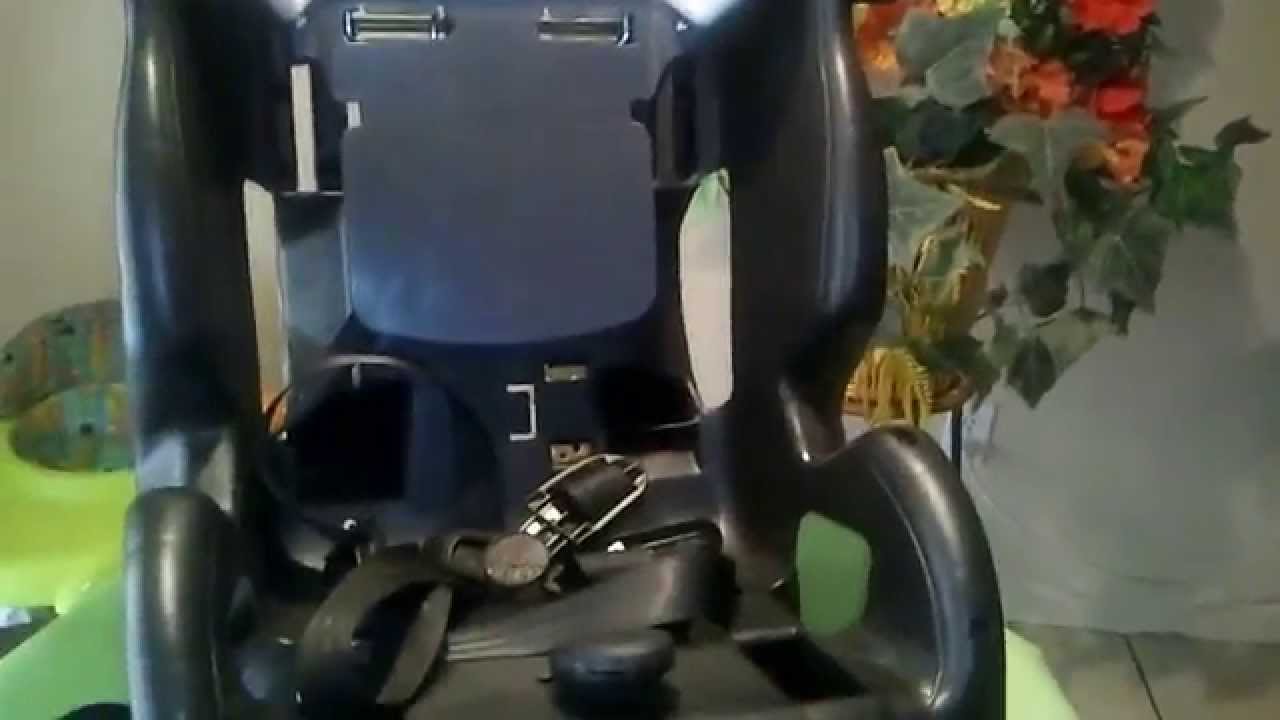
Removing The Old Cover (if Needed)
If you’re replacing an old cover, remove it carefully. Most covers are held by elastic bands, hooks, Velcro, or zippers. Gently undo each one. Take note of how the old cover was attached—snapping a photo can help later. Be careful not to damage foam padding or sensors under the seat.
Cleaning The Seat
Never put a new or clean cover on a dirty seat. Use a vacuum to pick up dust and crumbs. Wipe the seat with a damp cloth and mild soap. Wait until it’s fully dry before continuing. This step prevents odors and makes the cover fit better.
Laying Out The New Cover
Unpack your cover and let it sit for a while to relax any wrinkles. Lay it flat and check for:
- Front and back sides
- Headrest and armrest holes
- Straps, hooks, or fasteners
Match each part to the corresponding section of your seat. Some covers are marked with labels like “backrest” or “seat base. ”
Installing The Seat Base Cover
This is usually the largest part and can be tricky if the seat is contoured. Follow these steps for a snug fit:
- Align the cover: Start by matching the seams of the cover with the seat’s edges. Make sure the seatbelt buckle holes are in the right place.
- Pull the cover over: Begin at the front edge and slowly work the cover toward the back, smoothing out wrinkles as you go.
- Tuck in edges: Use your fingers or a flat tool to push the cover into the gap between the seat base and the backrest. Some covers have a foam stick or flap for this.
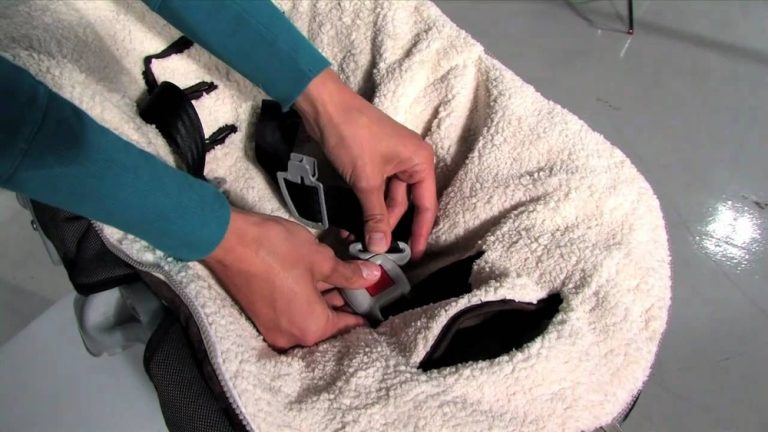
- Secure underneath: Reach under the seat to find straps or hooks. Fasten these tightly, but don’t force them—they should hold the cover firmly without tearing it.
- Check for movement: Sit on the seat and shift your weight. If the cover moves, tighten the straps again.
A common mistake here is rushing and leaving the cover loose. Take your time to avoid bunching or misalignment.
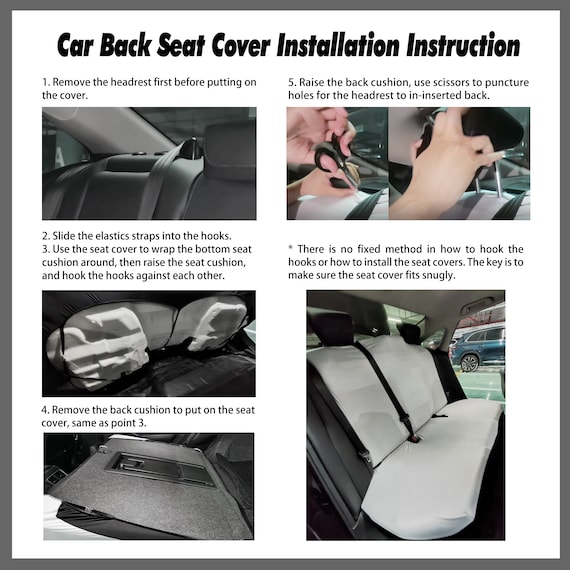
Installing The Backrest Cover
The backrest cover often has openings for headrests and seatbelts. Here’s how to get it right:
- Remove the headrest: Most cars have a release button or pin. Pull the headrest out and set it aside.
- Slide the cover over: Align the cover with the top of the backrest, making sure any holes match up.
- Smooth downward: Work the cover down evenly, pulling gently to avoid stretching or tearing.
- Tuck and secure: As with the seat base, tuck any extra material into creases. Fasten hooks, Velcro, or zippers at the back or bottom.
- Reinstall the headrest: Insert it through the pre-cut holes. Make sure the fit is tight and the holes are not stretched out.
If your seat has airbags built into the side, make sure the cover does not block or interfere with them. Always check your car’s manual for safety notes.
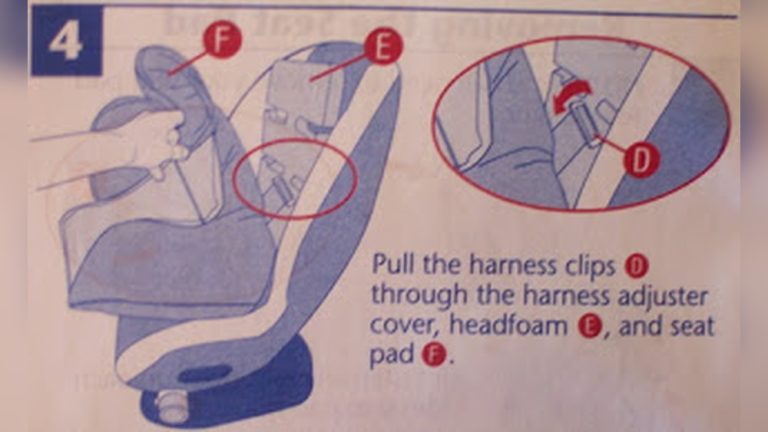
Installing The Headrest And Armrest Covers
Headrest covers are small but important for a complete look.
- Align and slide: Match the cover’s shape to the headrest. Pull it over gently.
- Close fasteners: Some covers use Velcro, zippers, or elastic bands at the bottom.
- Adjust: Make sure the seams are straight and the cover sits evenly.
For armrests, the process is similar—just be careful with any buttons or levers. Make sure these are not blocked by the cover.
Credit: www.youtube.com
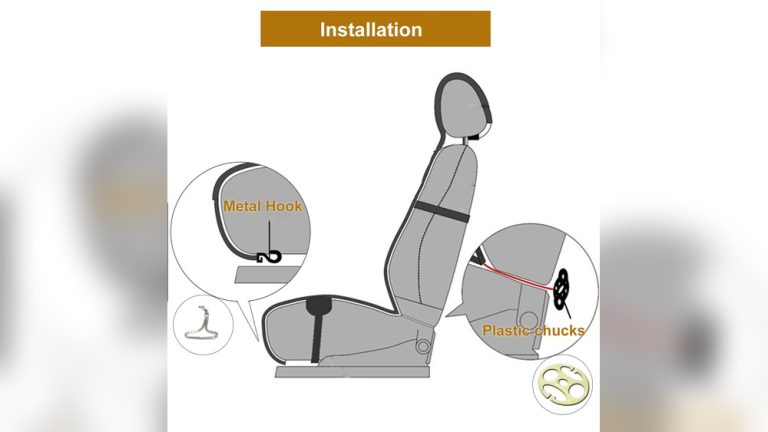
Securing Straps, Hooks, And Fasteners
Most covers use a mix of elastic bands, hooks, or straps to stay in place. Here’s a quick comparison of fastening methods:
| Fastening Method | Ease of Use | Security | Common Issues |
|---|---|---|---|
| Elastic Bands | Easy | Medium | Stretch out over time |
| Hooks | Moderate | Strong | Can slip off if not tight |
| Velcro | Easy | Medium | Picks up lint, loses grip |
| Zippers | Moderate | Strong | Can jam or break |
Double-check that every strap is tight and every hook is attached. Loose fasteners can lead to shifting covers and a sloppy look.
Adjusting For A Perfect Fit
No matter how well you install the cover, small wrinkles or slack may remain. Here are tips for a smooth finish:
- Spray with water: Lightly mist the cover and pull it tight. Most materials relax as they dry, reducing wrinkles.
- Use a hair dryer: On a low setting, gently warm the cover (especially leather or neoprene). This helps the material mold to the seat.
- Tuck, tuck, tuck: Go around the seat and push any extra material deep into crevices.
Be patient. Many covers look better after a day or two of use as they settle into the seat’s shape.
Reinstalling The Seat (if Removed)
If you took the seat out of the car, carefully reinstall it. Tighten all bolts and check that the seat slides and reclines smoothly. Make sure all electrical connectors (like seat heaters or airbags) are plugged in before finishing.
Final Inspection And Safety Checks
Once the cover is on, do a thorough check:
- All straps and hooks secure
- No loose fabric near pedals or seat controls
- Seat belts and airbags are clear and working
- No wrinkles or lumps under the seating area
Test the seat—slide it forward and back, fold it (if possible), and check for any movement of the cover.
Tips For Long-lasting Results
To keep your seat cover looking new:
- Clean spills quickly to prevent stains
- Vacuum regularly to remove dirt and crumbs
- Check fasteners every few months
- Avoid sharp objects that can tear the cover
A well-installed cover protects your seat’s value and comfort for years.
Common Mistakes To Avoid
Many beginners run into the same issues:
- Forcing covers: Stretching too hard can tear seams or fabric.
- Ignoring alignment: Not matching holes to seatbelt buckles leads to uncomfortable or unsafe seating.
- Skipping cleaning: Dirt under the cover can cause wear or odor.
- Over-tightening hooks: This can break plastic or tear the cover.
- Blocking airbags: Never cover or block side airbag zones.
Take your time and check each step as you go.
Credit: www.etsy.com
When To Get Professional Help
If your seat has complex electronics, built-in airbags, or advanced shapes (like sports seats), it may be safer to have a professional install the cover. This ensures everything works correctly and keeps your warranty valid. Many upholstery shops can install covers for a small fee and guarantee the fit.
Comparing Universal Vs. Custom-fit Covers
Wondering if you should use a universal or custom-fit cover? Here’s a quick look at the differences:
| Feature | Universal Cover | Custom-Fit Cover |
|---|---|---|
| Fit | Loose to moderate | Exact match |
| Installation Time | Shorter | Longer |
| Cost | Lower | Higher |
| Look | Basic | Factory appearance |
| Longevity | Moderate | High |
For daily drivers, a universal cover is usually fine. If you want the best look and fit—especially for newer or luxury cars—a custom-fit cover is worth the investment.

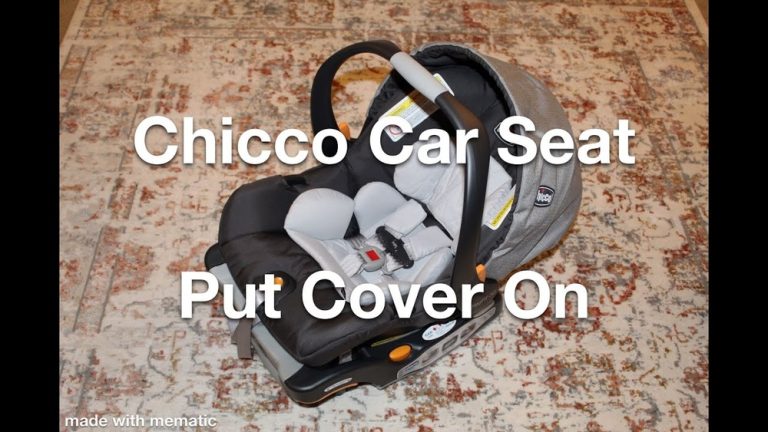
Credit: www.youtube.com
Practical Insights Most People Miss
It’s easy to skip small details that make a big difference. Here are two things beginners often miss:
- Label Each Piece: If your cover comes in several parts, use sticky notes or tape to label them before starting. This saves time and confusion, especially for back seats with split sections.
- Check for Hidden Fasteners: Many seats have small hooks or tabs under the cushion. Missing these can lead to a loose fit or even damage the cover.
And here’s a bonus: Take photos during each step. If you need to remove the cover again in the future, you’ll have a visual guide.
Frequently Asked Questions
How Long Does It Take To Put A Cover Back On A Car Seat?
Most people can finish one seat in 20 to 40 minutes. Custom-fit covers and rear bench seats may take longer, especially if you’re new to the process.
Can I Wash My Car Seat Covers In The Washing Machine?
Most fabric covers are machine washable, but always check the label first. Leather and vinyl covers should be cleaned by hand. Never put covers with foam padding in the washer.
Will A Seat Cover Affect My Car’s Airbags?
If installed incorrectly, a seat cover can block side airbags. Only use covers marked as “airbag compatible” if your seats have built-in airbags. Check your car’s manual for safety guidance.
How Do I Stop My Seat Cover From Sliding?
Make sure all straps and hooks are tight and tucked under the seat. For extra grip, some people place a non-slip mat under the cover.
Where Can I Find More Information On Car Seat Safety?
For detailed safety guidelines, visit the National Highway Traffic Safety Administration.
Putting a cover back on your car seat is about patience, attention to detail, and understanding your seat’s unique features. With the right approach, you’ll enjoy a fresh look and protect your car’s interior for years to come.