how to remove car seat cover
Removing a car seat cover sounds easy until you start and realize every car is different. Some covers fit loose, while others are tight and tricky. Sometimes, you worry you might break a clip or get stuck halfway. Knowing the right way to do it can save you time and protect your seats.
In this guide, you’ll learn how to remove car seat covers step-by-step, with tips for different seat types and common problems.
Why Remove Car Seat Covers?
People remove car seat covers for many reasons. You might want to clean them after a spill, replace old covers, or upgrade the look of your car. Sometimes, removing them is needed for repairs or airbag maintenance. Whatever the reason, doing it correctly helps keep the seat and cover in good shape.
Before You Start: What To Check And Prepare
It’s important to check a few things before you begin.
1. Type Of Seat Cover
Find out if your seat cover is universal, custom-fit, or factory-installed. Universal covers are usually easier to remove. Custom-fit and factory covers may have extra fasteners or be tucked deep into seat seams.
- Tools You Might Need
- Small flathead screwdriver
- Needle-nose pliers
- Scissors (for old covers)
- Flashlight
- Clean gloves
- Safety Precautions
Move the seat to its farthest position for better access. If your car has seat airbags, check the manual to avoid any risk. Never force or cut near airbag areas.
4. Take Photos
Use your phone to take a few pictures before and during removal. These will help you remember how to put everything back.
Step-by-step Guide: How To Remove Car Seat Cover
Let’s break the process down for most cars and seat types.
1. Move The Seat And Clear The Area
Start by sliding the seat backward and lowering the backrest if possible. Remove any items from the seat and floor. This gives you space to work and see all the fasteners.
2. Unfasten Hooks, Straps, Or Zippers
Feel under the seat and behind the backrest. Most covers use one or more of these:
- Elastic straps with hooks: Undo the hooks from the seat frame.
- Velcro strips: Pull gently to separate.
- Zippers: Unzip fully before moving the cover.
- Plastic buckles: Press to release.
Work slowly, and don’t yank. Hooks and straps sometimes get caught on metal bars under the seat.
3. Loosen The Edges
Run your fingers around the edges of the seat cover. Gently pull the cover away from the seat, starting at the bottom. For tight custom covers, use a flathead screwdriver to carefully lift the edge (don’t poke the seat).
4. Slide The Cover Off The Seat
Once the fasteners are open, pull the cover upward from the backrest and then forward off the seat cushion. If the cover is stuck, check for hidden hooks or ties, especially near the headrest holes or under the seat.
5. Remove Headrest Covers
If your seats have separate headrest covers, pull the headrest out (press the release button at the base) and slide off the cover. Some covers have small Velcro or zippers here.
6. Inspect For Extra Fasteners
Some car models use plastic clips or even hog rings (small metal rings) to keep the cover tight. For these, use pliers to gently open the clip. Take care not to break them if you plan to reuse the cover.
7. Clean Up And Store
Once the cover is off, shake out any debris. If you’re planning to reuse it, check for tears or damage. If the cover is dirty, now is a good time to wash it before putting it back on.
Special Cases: Different Seat Types
Not all seats are the same. Here’s how the process changes for common seat types.
Bucket Seats Vs. Bench Seats
| Seat Type | Common Fasteners | Removal Difficulty |
|---|---|---|
| Bucket Seat | Hooks, Velcro, Zippers | Medium |
| Bench Seat | Straps, Elastic, Buckles | Easy-Medium |
Bucket seats (common in front) often have more complex covers, with extra fasteners and tight fits. Bench seats (in the back) usually have simpler covers, but you may need to fold or remove the seat base.
Seats With Built-in Airbags
Some modern cars have side airbags inside the seat. These seats have special covers with breakaway seams. Never cut or force these covers. Always check your car’s manual or consult a dealer if you’re unsure.
Heated Or Powered Seats
Covers on heated or powered seats often have wires attached. Be gentle to avoid pulling on cables. If you see wiring, stop and look for connectors you can unplug safely.
Common Problems And How To Fix Them
Removing a car seat cover is usually easy, but sometimes you run into trouble. Here’s how to solve the most common issues.
Stuck Hooks Or Straps
If a hook won’t budge, shine a flashlight under the seat. Use pliers to gently twist or pull. If the strap is tangled, try loosening the tension by moving the seat forward or backward.
Torn Or Old Covers
Old seat covers may tear as you remove them. Don’t worry if you plan to replace them. For covers you want to keep, stop and check for extra fasteners before pulling harder.
Hidden Fasteners
Some covers have hidden Velcro or clips deep in the seat seams. Slide your fingers or a flat tool along the seam to feel for them.
Electrical Connections
Heated or power seats may have electrical connectors under the cushion. Never pull hard if you feel resistance. Look for a plastic connector you can unplug before removing the cover.
Tips For Easier Removal
A few expert tips can make the job smoother:
- Warm up the car: In cold weather, covers are less flexible. Let the car warm up for 5–10 minutes.
- Use gloves: Protect your hands from sharp edges under the seat.
- Keep screws and clips: Store small parts in a cup so you don’t lose them.
- Label parts: If you need to remove multiple covers, label them (driver, passenger, rear) for easy reinstallation.

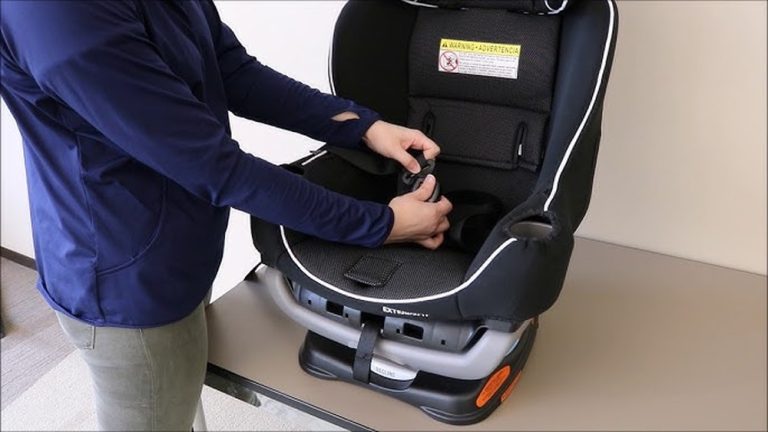
Credit: www.youtube.com
How Long Does It Take?
Removing a seat cover usually takes 10 to 30 minutes per seat. Bench seats can take longer, especially if you need to remove the seat base. If you’re new, allow extra time to avoid rushing.
When To Seek Professional Help
Some situations call for a pro:
- Luxury cars with delicate materials or built-in screens.
- Seats with airbags if you’re unsure.
- Covers with complex fasteners you can’t access easily.
Dealers and auto upholstery shops have special tools and experience. While you can do most jobs at home, some cases are safer in expert hands.

Credit: www.seatcoversolutions.com
What To Do After Removal
Once you’ve removed the cover, check the seat itself.
- Vacuum the seat to remove dirt and crumbs.
- Check for moisture or mold under the cover, especially if you had a spill.
- Inspect for wear or damage to the seat foam or fabric.
- Clean or wash the cover according to the label instructions.
If you plan to install a new cover, make sure the seat is completely dry and clean first.
Comparing Cover Types For Easy Removal
Some covers are easier to remove than others. Here’s a quick comparison:
| Cover Type | Removal Time | Reusable? | Tools Needed |
|---|---|---|---|
| Universal Fit | 10–15 min | Yes | None/Minimal |
| Custom Fit | 20–30 min | Yes | Screwdriver, Pliers |
| Factory Installed | 30–45 min | No/Hard | Special Tools |
Mistakes To Avoid
Even careful people make mistakes. Here are a few to watch for:
- Rushing the process: This can tear the cover or break fasteners.
- Forgetting hidden clips: Always check all sides before pulling.
- Mixing up covers: If removing more than one, keep covers and fasteners together.
- Pulling near airbags: Never force covers in airbag areas.
Non-obvious Insights Most Beginners Miss
- Check for seat sensors: Many newer cars have sensors in the seat for airbags or seatbelt reminders. Accidentally disconnecting these can trigger warning lights or even disable safety features.
- Cover shrinkage: Some covers shrink after washing, making reinstallation hard. To prevent this, air-dry instead of using a dryer, and check the fit before washing.
- Reinstallation is harder: Removing is often easier than putting the cover back on. Take notes, photos, or even a short video to remember the order of fasteners and clips.
- Hidden tools in car kit: Some cars include a small toolkit in the trunk for seat removal. Check your manual or trunk storage area before buying new tools.

Credit: www.youtube.com
Resources For More Help
If your car is unusual or you feel stuck, many automakers offer seat cover guides or videos. Some forums, like Car Throttle, have step-by-step help from real owners.
Frequently Asked Questions
How Do I Know If My Seat Has Airbags Inside?
Check your owner’s manual or look for “SRS Airbag” tags on the seat’s side. If you see these, the seat contains an airbag, and you should use extra care when removing the cover.
Can I Wash My Car Seat Cover In A Washing Machine?
Most universal and custom-fit covers can be machine washed, but always check the label first. Factory-installed covers usually need professional cleaning.
What If My Car Seat Cover Is Glued On?
Some factory covers use adhesive. You may need heat (like a hairdryer) to soften the glue. In most cases, it’s better to let a pro handle glued covers to avoid damage.
Will Removing The Cover Void My Car Warranty?
Generally, removing an aftermarket cover won’t affect your warranty. However, removing a factory-installed cover or airbag seat cover could. Check your warranty terms or ask your dealer.
How Do I Put The Cover Back On After Cleaning?
Reverse the removal steps: slide the cover on, reattach all fasteners, and check for a snug fit. Use your photos or notes to help. Make sure all straps and hooks are secure to prevent shifting.
Removing a car seat cover isn’t difficult, but attention to detail makes the difference. With the right approach, you can refresh your car’s look or keep your seats clean without stress. Take your time, use the right tools, and you’ll finish with a seat that looks and feels great.