How to Put Graco Car Seat Cover Back on Easily and Quickly
Putting a Graco car seat cover back on can feel tricky, especially if you just finished washing it and see a bunch of straps and clips. Many parents struggle with this task, and it’s easy to get frustrated when the cover seems too tight or the pieces don’t line up. But with the right steps, a little patience, and some insider tips, you can get your Graco car seat cover looking and fitting like new. This guide will walk you through each step, highlight common mistakes, and provide practical advice to make the process smoother.
Why Proper Reinstallation Matters
Correctly reinstalling the car seat cover is not just about looks. The cover helps keep padding in place, protects internal foam, and ensures that harnesses and buckles work as designed. A poorly installed cover can bunch up, block strap slots, or even interfere with buckles. For your child’s safety and comfort, it’s important to get this step right.
What You Need Before You Start
Gather everything before you begin:
- The clean, dry Graco car seat cover
- The car seat itself (fully disassembled if just cleaned)
- All harness straps and buckles
- Graco’s instruction manual (find the specific model online if lost)
- A flat, clean workspace
Having the manual handy is especially useful, as Graco makes several models, and clip locations can differ.

Credit: allurelakestorey.com
Understanding Graco Car Seat Parts
Before putting the cover back, let’s quickly review the main parts you’ll work with:
- Harness straps: Hold your child in place.
- Chest clip and buckle: Secure the harness.
- Padding and foam: Sit under the cover for comfort and safety.
- Cover fabric: The visible layer, with openings for harness and buckles.
Knowing these parts helps you avoid trapping straps under the cover or misaligning holes.
Step-by-step Guide: Putting The Cover Back On
Follow these steps carefully to reinstall your Graco car seat cover:
1. Check The Model And Orientation
Different Graco seats (SnugRide, Extend2Fit, 4Ever, etc. ) Have unique covers and attachment points. Identify your model. Check for any special instructions or features in your manual.
2. Lay Out The Cover And Seat
Place the car seat shell on a table or floor. Spread the cover out so you can see each opening. This helps you plan which part goes where.
3. Start With The Headrest Area
Slide the top part of the cover (with the headrest opening) over the headrest or upper shell. Align the holes for harness straps with the slots in the seat.
- Push harness straps through the correct slots.
- Make sure the cover sits flat with no bunching.
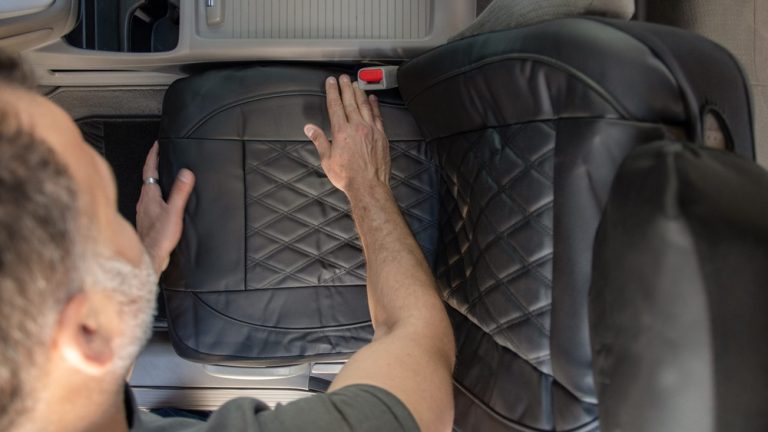
4. Fit The Backrest And Sides
Gently pull the cover down the back of the seat. Tuck the sides around the edges, making sure any elastic or hooks catch on the shell.
- Double-check that side impact foam or padding is fully covered.
- Watch for small elastic loops—these usually hook onto tabs under the seat shell.
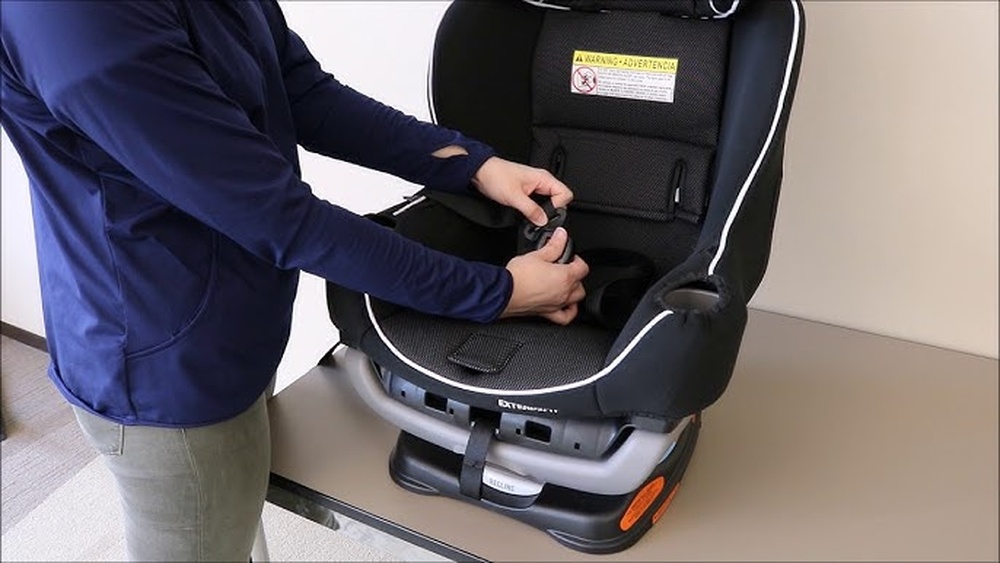
5. Insert The Harness Straps
Thread the harness straps through the cover’s slots. Pull them straight so there are no twists or bunches. For convertible seats, make sure both shoulder straps come out evenly.
- Insert the chest clip and buckle through the cover holes.
- If your model has separate crotch strap slots, double-check the correct one for your child’s size.
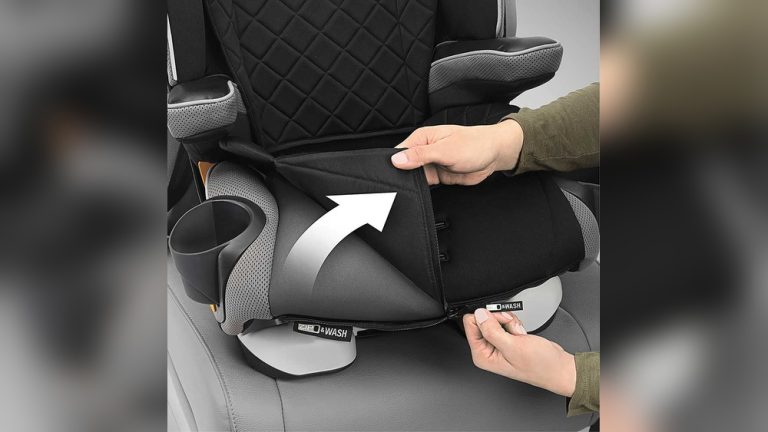
6. Attach The Bottom And Seat Area
Pull the lower part of the cover over the seat pan. Snap or hook any bottom loops in place.
- Tuck the cover tightly around the base.
- For seats with removable cup holders, attach covers around those areas now.
7. Recheck All Openings
Check each harness, buckle, and strap opening. Make sure:
- No strap is under the cover.
- Each buckle comes through the correct opening.
- There is no bunching or twisting under the cover.
8. Secure All Fasteners
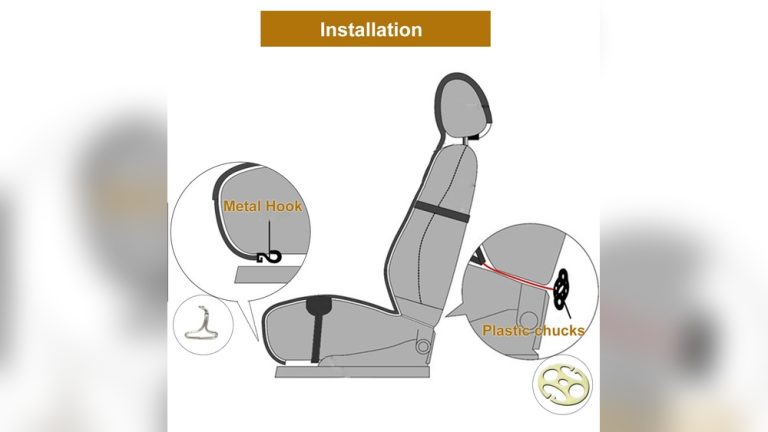
Many Graco covers use a mix of:
- Elastic loops
- Plastic hooks
- Velcro strips
- Snaps or buttons
Fasten each attachment point. If one feels too tight, check alignment—don’t force it.
9. Test Harness And Buckle Function
Before using the seat:
- Pull each harness strap—should move freely.
- Buckle and unbuckle the harness.
- Adjust headrest and recline if your model allows.
If anything feels stuck, reopen the cover and check for trapped straps.
10. Final Safety Check
Inspect the seat:
- All covers are smooth, with no loose fabric.
- Harnesses and buckles work perfectly.
- No foam or padding is exposed.
If you spot an issue, adjust before placing your child in the seat.
Common Mistakes And How To Avoid Them
Many parents make small errors that can affect safety or comfort. Here are common mistakes and solutions:
- Forgetting harness routing: Always double-check straps go through both the cover and the shell.
- Missing elastic loops: These secure the cover. Missed loops can cause slipping.
- Twisted harness straps: Straighten before final assembly.
- Wrong buckle slot: Use the slot that matches your child’s size and the car seat manual.
- Incorrect cover orientation: Some covers look symmetrical but only fit one way.
If you get stuck, don’t force the cover. Remove it and start again, following the manual and these steps.
Tips For A Smoother Process
Getting the cover back on can feel like a puzzle. These tips help:
- Work in good light—small slots and loops are easier to see.
- Take a photo before removing the cover for reference.
- Wash and dry the cover fully before reinstalling. Damp covers stretch and may not fit.
- Use your hands to feel for hidden loops or clips under the seat.
- If stuck, watch a model-specific video from Graco or a trusted parenting site.
Graco Car Seat Cover Attachment Types
Graco uses a few different cover attachment methods. Here’s a comparison for quick reference:
| Attachment Type | Common Models | How to Secure |
|---|---|---|
| Elastic loops | SnugRide, 4Ever | Hook under shell tabs |
| Plastic hooks | Extend2Fit | Snap into shell slots |
| Velcro strips | Contender, SlimFit | Press Velcro together under seat |
| Snaps | Premier models | Press snap buttons together |
Knowing your seat’s system makes reattachment faster and reduces frustration.
How Different Graco Models Compare
Some Graco car seats are easier to assemble than others. Here’s a quick model comparison:
| Model | Cover Removal | Cover Reinstallation Ease |
|---|---|---|
| SnugRide 35 | Simple | Easy |
| 4Ever DLX | Moderate | Moderate |
| Extend2Fit | Moderate | Challenging |
| Tranzitions | Easy | Easy |
Some covers are tighter for safety, so don’t worry if it takes a few tries.
Frequently Missed Steps (what Beginners Overlook)
Even careful parents can overlook these details:
- Cup holder installation: Some models require the cup holder to be inserted before the side covers go on.
- Foam padding alignment: If the foam is shifted, the cover won’t fit smoothly. Always check before covering.
- Shoulder harness height: Adjust harness height before putting the cover on, not after.
- Labels and warning tags: These need to stay visible. Don’t tuck them under the cover.
These small steps make a big difference in safety and ease of use.
When To Replace, Not Reinstall
Sometimes, a cover is too worn or damaged to reuse. Replace the cover if:
- There are tears or holes exposing foam.
- The elastic is stretched out and doesn’t hold.
- It no longer fits tightly after washing.
Using a damaged cover can reduce protection in a crash.
Cleaning Tips For Graco Car Seat Covers
Regular cleaning helps keep your car seat safe and looking good. Here’s how to clean covers without damaging them:
- Machine wash on gentle cycle, cold water.
- Air dry only—never use high heat, which can shrink or deform the cover.
- Spot clean straps with mild soap and water (don’t machine wash harnesses).
- Avoid bleach or harsh chemicals.
Following these tips keeps covers in good shape for reinstallation.
How To Find Your Graco Manual Online
If you lost your manual, you can find the correct instructions online. Visit the official Graco website and search by your car seat’s model number, usually found on a label on the back or bottom of the seat. Manuals give you detailed diagrams and sometimes troubleshooting tips for tricky covers. For more guidance, visit Graco’s official manual page.

Credit: www.youtube.com
Troubleshooting: What If The Cover Still Won’t Fit?
If your cover is still not fitting after following these steps:
- Double-check the orientation—some covers only fit one way.
- Lay the cover flat and compare holes to the seat’s slots.
- Start at the top and work down, making sure each section is secure before moving on.
- If the cover seems too small, let it air dry longer. Slight dampness can make it shrink.
If all else fails, contact Graco customer support for model-specific help.
Frequently Asked Questions
How Often Should I Wash My Graco Car Seat Cover?
Wash the cover as needed—usually every few months or after spills. Too much washing can wear out the fabric. Always follow the care instructions in your manual.
Can I Machine Dry My Graco Car Seat Cover?
No, always air dry the cover. Machine drying can shrink or damage the fabric, making it hard to put back on and reducing its effectiveness.
What If I Lost A Cover Attachment Hook Or Loop?
Contact Graco customer support for replacement parts. Do not use the seat with missing hooks or loops, as the cover may not stay in place during a crash.
Is It Safe To Use A Homemade Or Third-party Cover?
Use only Graco-approved covers. Homemade or off-brand covers may not fit correctly, potentially affecting harness function and safety.
Can I Reinstall The Cover Without Removing The Harness Straps?
In most cases, you’ll need to loosen or partially remove the harness to get the cover on and off. Follow your manual for the safest way to do this without damaging the straps.
Putting your Graco car seat cover back on does not have to be stressful. With the right approach, careful attention to detail, and a few practical tips, you’ll have a seat that’s safe, comfortable, and ready for your next trip. Remember, the extra time you spend now means peace of mind every time your child rides with you.