How to Install Front Car Seat Covers With Hooks: Easy Guide
Many car owners choose to install front seat covers to protect their seats, upgrade the look of their vehicle, or cover existing damage. If you’ve bought front car seat covers with hooks, you might feel confused about how to secure them correctly. The process can seem tricky, especially if you’re new to working with car accessories. But with a clear guide, you can install them yourself, save money, and get a snug, professional-looking result.
This article will walk you through the complete process of installing front car seat covers with hooks. You’ll learn what tools you need, how to prepare your seats, step-by-step instructions, and expert tips for a perfect fit. Along the way, you’ll find out what beginners often overlook, how to avoid common mistakes, and ways to keep your covers looking good for years.
By the end, you’ll have the confidence to protect your seats and upgrade your driving experience—all without a trip to the mechanic.
Why Use Front Car Seat Covers With Hooks?
Front car seat covers do more than just change how your car looks. They offer real-world benefits:
- Protection: They shield your original upholstery from spills, dirt, sun damage, and wear.
- Comfort: Some covers add padding or use materials that feel better, especially in hot or cold weather.
- Easy Cleaning: Most covers can be removed and washed, making it easier to maintain your car’s interior.
- Personalization: You can choose colors and designs that match your style.
Covers with hooks offer an extra advantage: they usually stay in place better than slip-on covers. The hooks secure the cover under the seat, reducing movement and wrinkles.
What You Need Before You Start
Before you install your front car seat covers with hooks, gather these items:
- The seat cover set (make sure it’s for front seats)
- All included hooks and elastic straps
- A flashlight (for seeing under the seat)
- A small flathead screwdriver (helpful for tucking fabric)
- Scissors (for trimming any excess straps)
- Cleaning wipes or vacuum (for prepping your seats)
- The installation instructions from the manufacturer
Most covers fit standard seats, but some cars have special features (like seat airbags or built-in armrests). Always check the product label to make sure your covers are compatible.
Preparing Your Car Seats
A little preparation makes the installation smoother and helps your covers last longer.
- Remove Personal Items: Take off any seat cushions, organizers, or attachments.
- Clean the Seats: Vacuum crumbs and dust. Wipe off stains or sticky spots. Clean seats help the cover grip better and prevent trapped dirt.
- Adjust the Seat Position: Slide the seat back as far as possible and recline it slightly. This gives you room to work under and behind the seat.
- Inspect the Seat: Look for sharp objects or broken springs that could tear the new cover.
Many people skip cleaning, but dust and grit can rub against your new covers, causing early wear or even small tears.
Understanding Hook Types And Placement
Hooks are the most important part for a tight, secure fit. There are a few common types:
| Hook Type | Material | Typical Use | Durability |
|---|---|---|---|
| S-shaped Metal | Steel | Under seat attachment | High |
| Plastic Clip | Hard Plastic | Side or elastic straps | Medium |
| Elastic Loop | Elastic cord | General securing | Medium |
Most covers use S-shaped metal hooks attached to elastic straps. These are designed to hook onto the metal frame or springs underneath your seat. If your cover uses a different hook, check the instructions for special steps.
A non-obvious tip: Always count your hooks before starting. Missing a hook can lead to a loose or uneven fit.
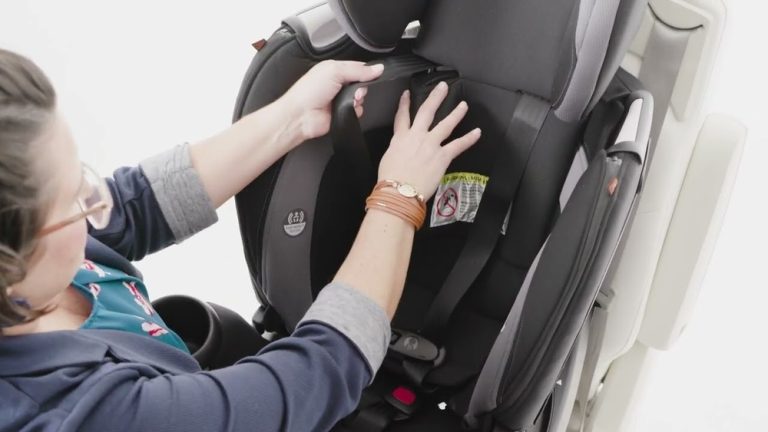
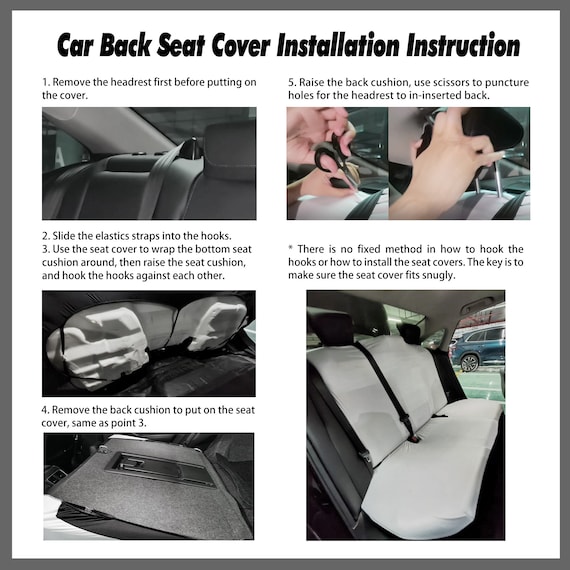
Credit: www.cover-company.com
Step-by-step Installation Guide
Follow these steps for a proper and tight installation.
1. Identify Left And Right Covers
Some covers are universal, but many are shaped for the driver or passenger side. Look for labels like “L” or “R. ” If there’s no label, compare the covers to the seat shape. The wider side usually goes toward the door.
2. Fit The Headrest Cover
Remove the headrest from the seat. Slide the headrest cover on, making sure the seams line up. Replace the headrest into the seat, poking holes in the cover if needed (some covers have pre-cut holes).
3. Slide The Backrest Cover Over
Pull the backrest part of the cover over the seat back. Work from the top down, smoothing out wrinkles as you go. Make sure the cover sits evenly and the seams are straight.
- If your seat has an integrated seat belt, gently feed it through the slot or opening in the cover.
4. Tuck In The Sides And Back
Push any extra fabric between the seat back and seat bottom. Use your hand or a small flathead screwdriver to help tuck the fabric deeply. This keeps the cover from shifting.
5. Install The Seat Bottom Cover
Drape the bottom cover over the seat cushion. Pull it forward and down, lining up the edges. Smooth out wrinkles and make sure the cover reaches all corners.
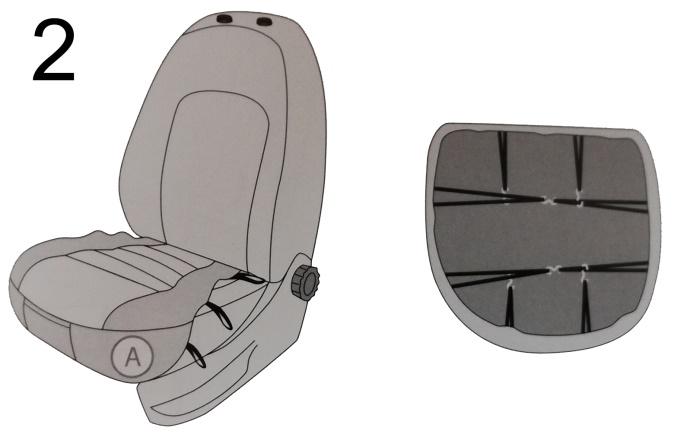
6. Attach The Hooks Underneath
This is the most important step for a secure fit:
- Find the elastic straps with hooks attached to the cover.
- Feed the straps through the gap between the seat back and bottom, so they hang behind and underneath the seat.
- Using a flashlight, locate a sturdy place under the seat—usually a metal bar or spring.
- Attach each hook to the frame, making sure the strap is tight but not overstretched.
- Repeat for all straps. Most covers have at least 2–4 hooks per seat.
- If there’s extra strap length, tuck it away or trim with scissors.
| Number of Hooks | Security Level | Recommended For |
|---|---|---|
| 2 | Basic | Occasional use, simple seats |
| 4 | Good | Everyday use, most cars |
| 6+ | Excellent | Heavy use, trucks, SUVs |
A common mistake: Beginners often attach hooks to plastic panels or wires. Always use a solid metal part for the strongest hold.
7. Adjust And Check Fit
Sit in the seat and move around. Check for sliding, bunching, or loose spots. Pull straps tighter if needed. Make sure all airbag openings or controls are uncovered.
8. Repeat For Second Seat
Install the cover on the passenger seat, following the same steps.
Special Cases And Extra Tips
Some cars have special seats or features that require extra attention:
- Seats with Side Airbags: Use covers labeled “airbag safe” with split seams. Never block the airbag.
- Built-in Armrests: Remove the armrest, cut a small slit in the cover (if allowed), and reinstall.
- Heated/Ventilated Seats: Choose thin, breathable covers. Thick covers may block heating or cooling.
- Electric Controls: Make sure covers and straps do not block buttons or levers.
A non-obvious insight: If your seat has a map pocket, tuck the cover fabric behind it instead of covering it. This keeps the pocket usable and prevents stretching.
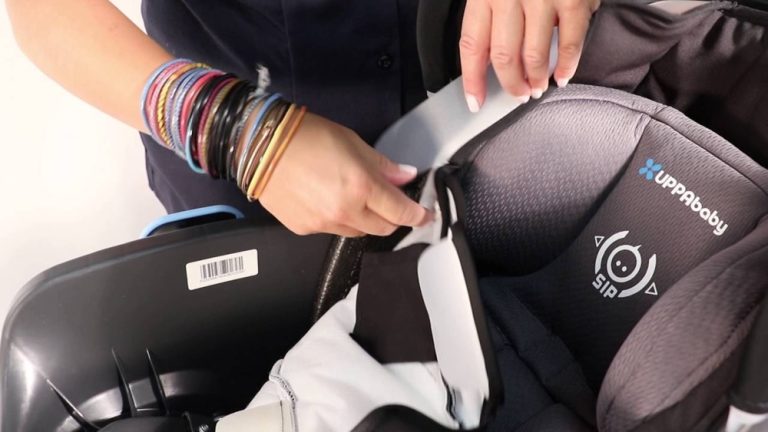
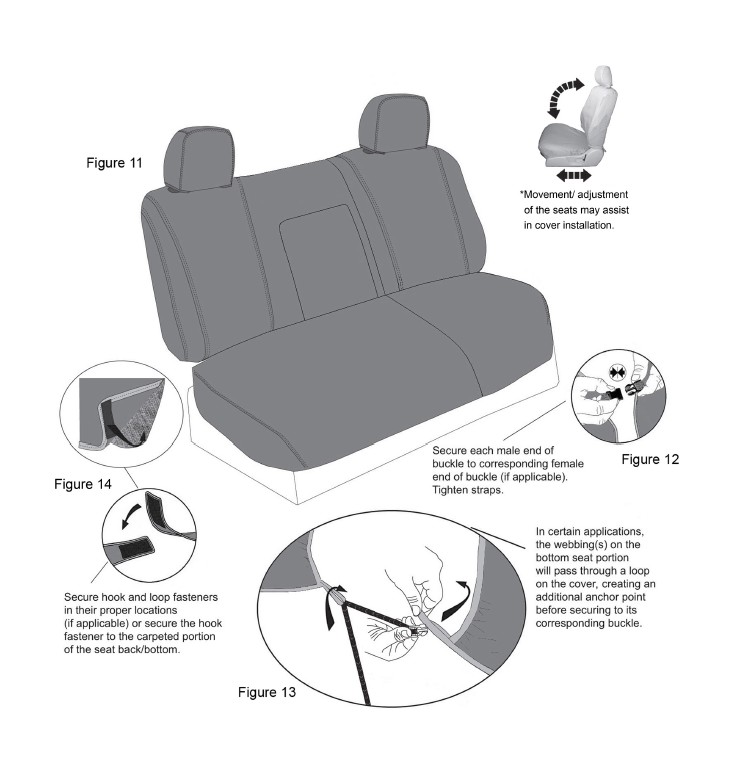
Credit: www.portsidetattoosandiego.com
Caring For Your New Seat Covers
Proper care helps your front car seat covers with hooks last longer:
- Clean Regularly: Remove and wash covers as recommended. Spot-clean stains quickly.
- Check Hooks: Every few months, check that hooks are still tight and straps are not stretched out.
- Avoid Sharp Objects: Don’t keep keys, pens, or tools in your pockets when sitting—these can damage the cover.
- Protect From Sun: Use a windshield shade to reduce fading and cracking.
| Care Action | Frequency | Reason |
|---|---|---|
| Vacuuming | Weekly | Removes dust and grit |
| Spot Cleaning | As needed | Prevents stains |
| Full Wash | Every 3–6 months | Deep cleaning |
Caring for your covers also keeps your car’s value higher over time, as the original seats remain in better condition.
What To Do If Something Goes Wrong
Even with good instructions, you might run into problems. Here’s how to handle common issues:
- Cover Slides Around: Check that all hooks are attached to solid metal parts. Tighten straps if possible.
- Wrinkles or Bunching: Remove and reinstall, smoothing the fabric as you go. Tuck deeper between the seat sections.
- Hooks Don’t Reach: Try moving the cover slightly or use longer elastic straps (some covers include extras).
- Uncomfortable Feeling: Make sure the cover isn’t too tight, which can affect padding. Try repositioning the bottom part.
- Blocked Controls or Airbags: Remove and adjust the cover to clear all safety features. Never cut or block airbag seams.
If your cover still won’t fit, check the manufacturer’s website or reach out to their support. Sometimes covers are mislabeled or not compatible with your seat style. For more details about car interior accessories, you can visit the Automobile Seat Wikipedia page.
Credit: www.extremeterrain.com
Frequently Asked Questions
How Long Does It Take To Install Front Car Seat Covers With Hooks?
For most people, it takes about 30–45 minutes to install both front seat covers. The first cover usually takes longer as you learn the process, but the second is much faster.
Can I Install Car Seat Covers With Hooks If My Seats Have Airbags?
Yes, but you must use covers labeled as airbag compatible. These have special stitching or seams that allow the airbag to deploy safely. Never use standard covers on seats with side airbags.
Do I Need Any Special Tools To Install Seat Covers With Hooks?
No special tools are required, but a flashlight and a small flathead screwdriver can help you see under the seat and tuck in fabric more easily.
Will Seat Covers With Hooks Fit All Car Models?
Most covers are designed to fit standard seats, but some cars have unusual shapes or features. Always check the cover’s compatibility list before buying. Custom-fit covers are available for difficult models.
How Do I Wash And Care For My Seat Covers?
Most seat covers are machine washable—remove them and wash on a gentle cycle with mild detergent. Air dry to avoid shrinking. Always check the care label for specific instructions.
Protecting your seats with well-installed covers is a smart move for every driver. With the right approach, your interior will stay looking great for years, and you’ll enjoy every drive a little more.