How to Put Cover Back on Graco Car Seat: Easy Step-by-Step Guide
Putting the cover back on a Graco car seat can feel like solving a puzzle, especially if it’s your first time. After cleaning or washing, many parents struggle to figure out which strap goes where, or how the fabric fits snugly again.
If you’re facing this challenge, you’re not alone. This step-by-step guide will help you reassemble your Graco car seat cover with confidence, saving you time and frustration.
Many parents are surprised to find out that even small mistakes—like missing a hidden elastic or twisting a harness—can affect both safety and comfort. I’ll walk you through the process, give you tips to avoid common errors, and share insights most manuals skip.
You don’t need any special skills, just a bit of patience and a clear process.
Why Proper Reassembly Matters
A car seat isn’t just about comfort—it’s about safety. The cover does more than look nice. It keeps the harness in the right position, cushions your child, and protects the seat’s structure. If the cover is not installed correctly, the harness may not work as designed. That’s why it’s important to take reassembly seriously, follow the right steps, and check your work carefully.
Get Ready: Preparation Steps
Before you start, gather everything you need. Having all parts and tools at hand will make the process smoother and prevent last-minute searching.
- Clean and dry cover: Make sure your Graco seat cover is completely dry. Even a little moisture can cause mildew or make reassembly tricky.
- Seat components: Have the car seat base, harness, and padding inserts ready. Lay them out in the order you’ll need them.
- Manual: If you have the original Graco manual, keep it nearby. Every model is slightly different.
- Workspace: Use a clean, flat surface with good lighting.
- Camera or phone: If you took photos during removal, get them ready for reference.
If you didn’t take pictures before removing the cover, don’t worry. This guide will cover all the main touchpoints and visual cues you’ll need.
Credit: sigra.com
Understanding Your Graco Car Seat Model
Graco makes many car seat models—like SnugRide, Extend2Fit, 4Ever, and more. Most covers attach in similar ways, but small differences exist. For example, infant seats often use more snaps and elastic, while convertible seats may have extra padding sections or unique harness threading.
Here’s a quick comparison of how cover attachment methods differ by type:
| Model Type | Main Cover Attachments | Special Features |
|---|---|---|
| Infant (SnugRide, Click Connect) | Elastic, plastic hooks, snaps | Removable head support, canopy slots |
| Convertible (Extend2Fit, 4Ever) | Tabs, Velcro, elastic | Multiple harness slots, cup holders |
| Booster (Turbobooster, Tranzitions) | Elastic, minimal snaps | Less padding, armrest covers |
Always check your manual for model-specific instructions, but the core steps in this guide apply to nearly all Graco seats.
Step-by-step Guide: Putting The Cover Back On
1. Start With The Main Seat Cover
Lay the main cover piece over the seat shell. Align the harness slots in the fabric with the slots in the seat’s plastic shell.
- Feed each harness strap through the correct slot. Make sure they are not twisted.
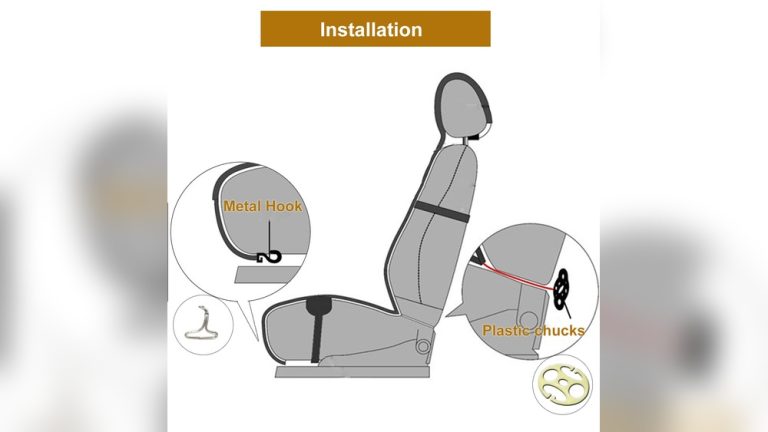
- Attach any plastic hooks or elastic loops to the seat base. You’ll usually find these under the seat or along the back edge.
- Check that the fabric sits flat, with no bunching.
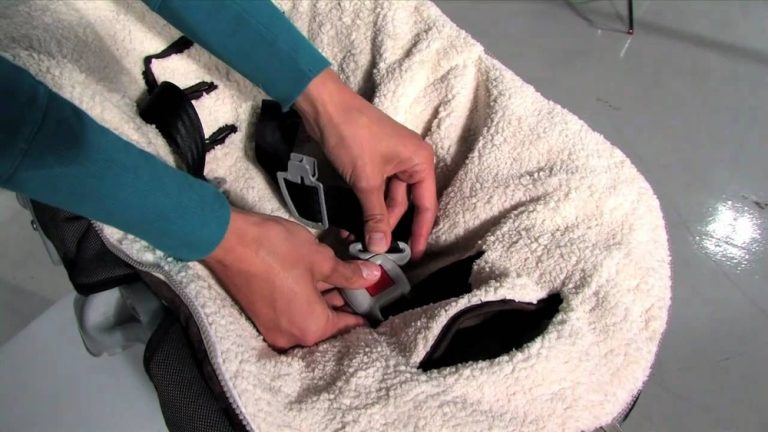
2. Reattach The Harness And Buckle Pads
Some Graco seats have padded covers for the harness and crotch buckle.
- Slide the harness pads onto the straps, making sure the soft side faces your child.
- Fit the buckle pad over the crotch buckle, checking that it’s not blocking the release button.
3. Position The Headrest And Side Pads
If your model has a removable headrest or extra side padding, put these back next.
- Align the headrest slots with the harness slots.
- Attach any snaps or Velcro strips to hold pads in place.
4. Secure The Cover Around The Edges
Many Graco covers have elastic or tabs that wrap around the seat’s edge.
- Tuck the fabric under the plastic lip of the seat shell.
- For tabs or hooks, listen for a click or gentle snap as you press them into place.
- Work your way around the seat, checking that no part of the cover is loose or slipping off.
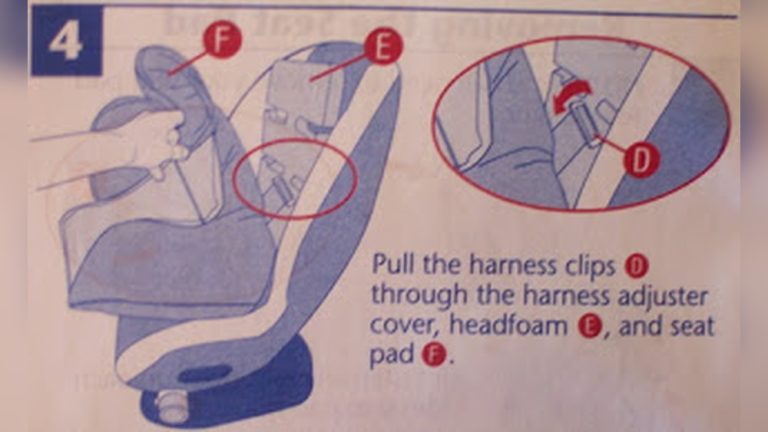
5. Thread The Harness Straps (if Removed)
If you removed the harness straps for cleaning, rethread them through the correct slots. This is crucial for safety.
- Pull the strap through the slot at or just above your child’s shoulder height.
- Make sure both sides are even.
- Secure the straps using the metal splitter plate or anchor bar on the back of the seat.
A common beginner mistake is twisting the harness or threading through the wrong slot. Double-check with your manual or a photo if you’re unsure.
6. Reinstall The Chest Clip And Buckle
If you removed the chest clip or crotch buckle, reinstall them now.
- Insert the buckle into the slot at the front of the seat.
- Snap the chest clip onto the harness straps at about armpit level.
7. Replace Cup Holders And Accessories
Some Graco seats include cup holders, armrest covers, or toys. These usually attach last.
- Slide the cup holder into the slot or twist to lock it in place.
- Reattach armrest covers, making sure they’re secure.
8. Final Checks
Before using the seat, do a careful check:
- Harness slot alignment: Straps should go through the correct slots.
- No twists: All straps must lay flat.
- Cover secure: Tug gently on the cover; it shouldn’t pop off.
- Buckles and clips: Test for smooth operation.
- Padding: All pads should be firmly attached, not loose or folded.

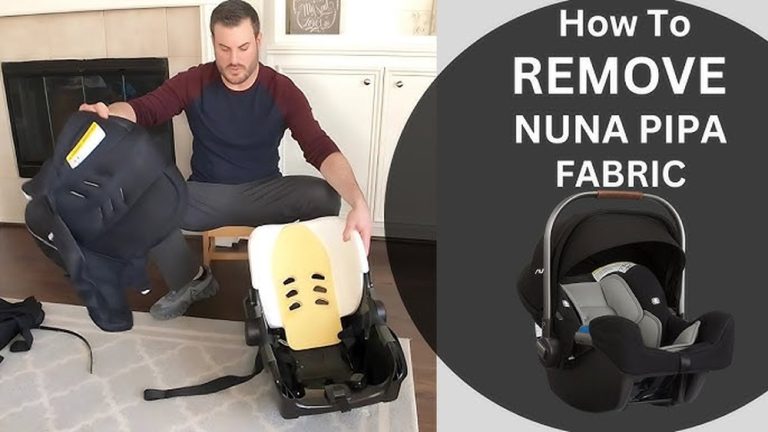
Credit: www.youtube.com
Tips For A Smooth Reassembly
- Work slowly: Rushing leads to mistakes. Take your time, especially around harness slots and hooks.
- Use your hands: Your fingers can find hidden tabs or elastic better than tools.
- Check for leftover pieces: If you have an extra part, stop and look for where it goes.
- Refer to photos: Pictures from before you removed the cover can be a lifesaver.
- Watch for hidden slots: Some covers have small, hard-to-see slots for harnesses near the seat’s base.
Common Mistakes And How To Avoid Them
Even experienced parents make errors when reassembling a Graco car seat. Here’s how to sidestep the most frequent issues:
- Misaligned harness straps: Always use the correct slot for your child’s height. Too low or high can reduce crash protection.
- Twisted or doubled straps: Run your hand along the harness to feel for twists.
- Loose cover edges: If the cover pops off easily, recheck all hooks and elastic.
- Missing pads or inserts: Some small pads (like newborn head support) are easy to forget.
- Blocked buckle button: Buckle pads should never cover the release button.
If you’re unsure, compare your finished seat to images in your manual or on the Graco website.
When To Replace The Cover
A car seat cover should fit snugly and be free from damage. Replace it if you notice:
- Tears or holes that can’t be repaired
- Loose elastic that won’t stay in place
- Broken snaps or hooks
- Fading or thinning fabric from long use
Using a damaged cover can affect both comfort and safety. Graco sells replacement covers for most models.
Cleaning And Maintenance Tips
Regular cleaning can keep your Graco car seat fresh and extend its life. Here are some simple maintenance tips:
- Wipe spills quickly: Use a damp cloth and mild soap.
- Deep clean periodically: Remove the cover and follow the washing instructions in your manual.
- Air dry: Never use a dryer, as heat can shrink or damage the cover.
- Check for wear: Inspect the cover every few months for signs of damage.
Keeping your cover clean helps prevent mold, odors, and skin irritation for your child.
How Graco Covers Compare To Other Brands
Graco car seats are known for practical cover design. Here’s how they compare to two other popular brands:
| Brand | Cover Removal | Reassembly Difficulty | Cleaning |
|---|---|---|---|
| Graco | Mostly easy, some hidden hooks | Moderate | Machine-washable covers |
| Britax | More snaps, less elastic | Moderate to difficult | Hand-wash recommended |
| Evenflo | Simple elastic and Velcro | Easy | Machine-washable covers |
Graco covers balance easy removal with a secure fit. If you struggle with one brand, you may find Graco’s system more forgiving.
What If You Get Stuck?
If you can’t get the cover back on, don’t force it. Forcing parts can break hooks or damage fabric. Here’s what you can do:
- Look up your model’s manual online: Graco’s support website has PDFs for nearly all models.
- Watch a video: Many parents upload video guides to YouTube. Search for your exact Graco seat model.
- Contact Graco support: Their customer service can answer specific questions.
For extra help, you can also check out this guide from the National Highway Traffic Safety Administration.

Credit: www.youtube.com
Frequently Asked Questions
How Often Should I Wash The Graco Car Seat Cover?
For everyday use, washing every 1-2 months is usually enough. Wash sooner if your child spills food, has an accident, or if the seat is exposed to sweat or illness.
Can I Put The Graco Seat Cover In The Dryer?
No, you should always air dry the cover. Machine drying can shrink the fabric or damage elastic, making it hard to put back on.
What If I Lost A Part, Like A Hook Or Pad?
You can buy replacement parts directly from Graco. Check your seat’s model number and order the correct piece from their official website or customer service.
Is It Safe To Use The Car Seat Without All The Pads?
No. Missing pads can reduce protection and comfort. Always use every pad and insert that came with your model, especially for infants.
Why Does My Cover Seem Too Tight After Washing?
Covers may shrink slightly if washed in hot water or dried with heat. Always wash in cold water and air dry. If the cover is too tight, double-check the harness and elastic placement—sometimes a misplaced strap causes the fit to seem wrong.
Reassembling your Graco car seat cover can be a satisfying process when done carefully. With these steps and tips, you’ll have your seat looking and functioning like new—ready to keep your child safe on the road.