How to Remove Graco Car Seat Cover: Step-by-Step Guide
Removing a car seat cover can seem like a simple task, but if you own a Graco car seat, you know it’s a bit more involved. Parents often struggle with sticky snacks, spills, and daily messes, making regular cleaning essential for both hygiene and your child’s comfort. The good news? With the right steps, you can take off your Graco car seat cover without damaging the seat or the cover itself. Whether you’re a new parent or just haven’t cleaned your car seat in a while, this guide walks you through every detail, from tools you need to common mistakes to avoid.
Why Removing The Graco Car Seat Cover Matters
A clean car seat cover isn’t just about appearance. Crumbs, spilled drinks, and even sweat can make the seat uncomfortable and unhygienic. Studies show that children’s car seats can harbor more bacteria than the average toilet seat if not cleaned often. Dirt and grime can also damage the seat’s fabric, shorten its lifespan, and even affect the seat’s safety features if left unchecked. Regular cleaning is not just for looks—it keeps your child healthier and your investment lasting longer.
Before You Begin: What You Need
Preparation saves time and prevents mistakes. Before you start, gather these items:
- Graco car seat manual: Every model is a bit different. The manual explains key clips and steps.
- Small flat-head screwdriver: Helps with stubborn clips.
- A clean workspace: Use a bed, large table, or clean floor.
- Camera or smartphone: Snap photos as you go. This will help when you put the cover back on.
- Plastic bag or box: For small parts like buckles and clips.
Having everything ready means you won’t be searching for tools with half a cover hanging off.
Understanding Your Graco Car Seat Model
Graco produces several car seat types—infant, convertible, and booster seats. The removal process is similar, but some models have unique clips, harnesses, or padding. Here’s a brief comparison:
| Type | Common Features | Removal Difficulty |
|---|---|---|
| Infant Car Seat | Detachable base, carry handle | Easy |
| Convertible Car Seat | Grows with child, multiple recline positions | Moderate |
| Booster Seat | Less padding, simple harness | Easy to Moderate |
Check your seat’s label, usually under or behind the seat, to confirm your model. You can also look up instructions on the Graco official website if you lost the manual.
Step-by-step Guide: How To Remove Graco Car Seat Cover
Removing the cover is straightforward if you follow these steps. These instructions cover most Graco seats, but always check your manual for model-specific notes.
1. Remove The Car Seat From The Vehicle
Start by disconnecting the seat from your car. This gives you more space and makes the process safer.
- For infant seats, press the release handle or button and lift the seat out.
- For convertible and booster seats, unbuckle the seatbelt or LATCH system.
Placing the seat on a stable surface prevents damage and keeps parts together.
2. Detach The Harness Straps
Most Graco seats use a five-point harness system. You’ll need to free the straps before removing the cover.
- Turn the seat over or look behind it.
- Find the metal splitter plate where harness straps connect.
- Slide each strap off the splitter plate.
- Pull the straps through the front of the seat.
Pro tip: Take a photo before removing the straps. This helps with reassembly.
3. Unhook The Chest Clip And Buckle
Unbuckle the chest clip and crotch buckle. These usually snap open easily.
- For some models, the crotch buckle comes out by sliding it through a slot at the seat’s base.
- Place all buckles and small pieces in your bag or box.
4. Remove The Headrest And Padding
If your Graco seat has extra padding or a removable headrest, gently pull it off.
- Some headrests are attached with Velcro or hidden snaps.
- Check carefully to avoid tearing the fabric.
5. Release The Seat Cover Clips And Tabs
Graco covers are held by elastic bands, plastic clips, or fabric tabs. Work your way around the seat:
- Feel along the edge of the cover for hooks or tabs.
- Use your fingers or a small flat-head screwdriver to loosen clips, especially in tight spots.
- Gently pull the cover away from the shell, being careful not to force anything.
If the cover feels stuck, double-check for hidden fasteners near the recline handle, armrests, or under the seat.
6. Remove The Cover From The Seat Shell
Once all fasteners are released, pull the cover off slowly. Some covers fit snugly around cup holders or armrests.
- Wiggle the cover gently if it catches on anything.
- Remove any remaining loose padding or inserts.
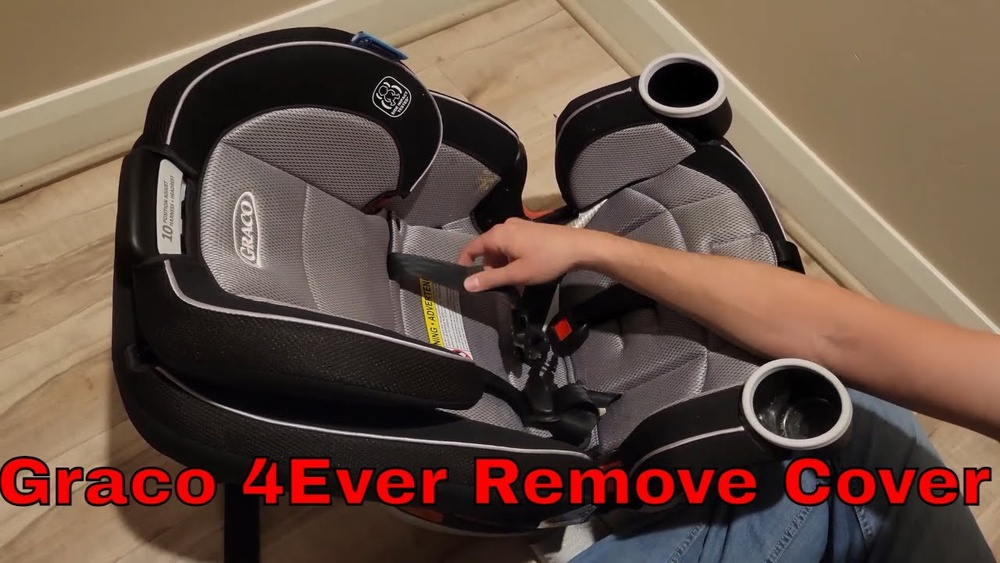
Now Your Cover Is Ready For Cleaning!

Credit: everestkitchennc.com
Common Mistakes To Avoid
Parents often make these errors when removing Graco car seat covers:
- Forcing Clips: Pulling too hard can break plastic parts.
- Skipping Photos: Without pictures, reassembly becomes confusing.
- Losing Small Parts: Buckles and inserts are easy to misplace.
- Ignoring the Manual: Each seat is unique; the manual prevents mistakes.
- Not Checking Warranty: Some seats lose warranty if parts are damaged during removal.
Taking your time prevents frustration and costly mistakes.
Cleaning Your Graco Car Seat Cover
Now that you’ve removed the cover, you’ll want to clean it properly. Most Graco covers are machine washable, but always check the label first.
Washing Instructions
- Use cold water and a gentle cycle.
- Avoid bleach or harsh detergents, which can weaken fabric or fade colors.
- Air dry the cover. High heat can shrink or damage it.
Harness straps, chest clips, and buckle covers should NOT go in the washing machine. Instead:
- Wipe them with a damp cloth and mild soap.
- Let them air dry before reassembling.
Cleaning The Seat Shell
While the cover is off, clean the plastic shell:
- Use a vacuum or brush to remove crumbs.
- Wipe with a damp cloth and mild soap.
- Dry thoroughly before putting the cover back on.
Non-obvious insight: Always double-check the harness slots and under seat pads for hidden crumbs—food can get trapped and attract pests.
How To Reinstall The Graco Car Seat Cover
Reassembly is often the hardest part, but photos and the manual make it easier.
- Align the Cover: Start from the headrest or top of the seat, then work down.
- Attach Clips and Tabs: Secure elastic, clips, or tabs in the same order you removed them.
- Replace Padding and Headrest: Add any inserts or pads you took out.
- Thread the Harness Straps: Feed straps through the correct slots (check your photo for reference).
- Reconnect Splitter Plate: Fasten straps to the metal plate at the back.
- Reinstall Buckles: Slide the crotch buckle and chest clip through the cover and snap them into place.
Final check: Tug on all straps and fabric to be sure everything is secure. If something feels loose, revisit your photos or manual.
Tips For A Smooth Process
- Schedule cleaning: Plan for cleaning when you won’t need the car seat for a few hours.
- Work in good light: Small clips and tabs are easier to see.
- Organize small parts: Use a tray or cup to avoid losing pieces.
- Test fit: After reassembly, check the seat in your car and adjust straps for a snug fit.

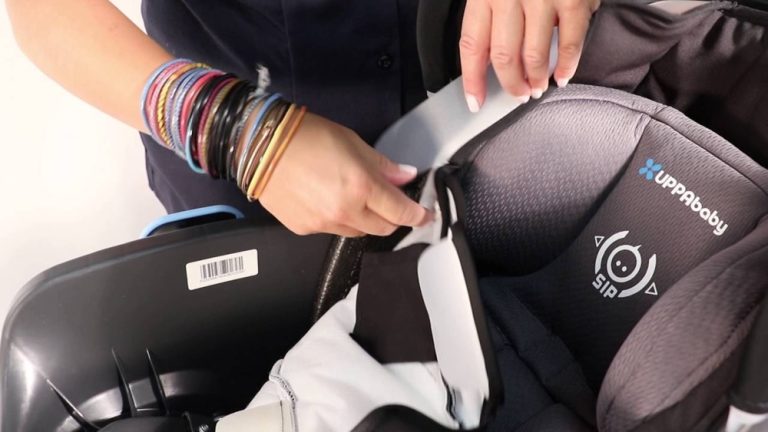
Credit: www.youtube.com
Model-specific Notes
Some Graco models have extra features that change the removal process:
| Model | Special Features | Removal Tips |
|---|---|---|
| 4Ever DLX | Integrated harness storage | Check for extra tabs inside harness compartment |
| SnugRide SnugLock | Removable newborn insert | Remove insert before cover for easier cleaning |
| Extend2Fit | Adjustable leg extension panel | Release panel before pulling off cover |
Always check for hidden zippers, Velcro, or unique tabs. If you’re stuck, search for your model’s video guide online.
How Often Should You Remove And Clean The Cover?
Experts recommend cleaning the cover every two to four weeks if your child eats or drinks in the seat, or at least every three months otherwise. Clean immediately after major spills or accidents.
Advanced tip: Rotate between two covers if possible. This way, you have a spare while one is drying.
When To Replace Your Graco Car Seat Cover
If the cover is torn, frayed, or the straps are damaged, it’s time for a replacement. Using damaged covers can affect safety. Only buy official Graco parts, as non-original covers may not meet safety standards.
Frequently Asked Questions
How Long Does It Take To Remove A Graco Car Seat Cover?
For most models, it takes 10-20 minutes. The first time may take longer, especially if you’re unfamiliar with the clips and harnesses. With practice, the process becomes faster.
Can I Machine Wash The Harness Straps?
No, you should never machine wash harness straps. The washing machine can weaken the fibers, reducing their ability to protect your child in a crash. Instead, clean straps with a damp cloth and mild soap.
What Should I Do If I Lost A Piece During Removal?
Contact Graco customer service for replacement parts. Never use makeshift items (like string or zip ties) as substitutes. Only official Graco parts guarantee safety and fit.
Are There Video Guides For My Graco Model?
Yes, Graco provides video guides for many models on their official website and YouTube channel. Search by your model name for the most accurate instructions.
How Do I Know The Cover Is Back On Correctly?
Check that all straps lie flat, clips and tabs are secure, and the seat feels tight when installed in your car. If anything seems loose or uneven, revisit your manual or photos, and adjust as needed.
Caring for your child’s car seat is as important as choosing the seat itself. By learning to remove and clean the Graco car seat cover properly, you keep your child safer, more comfortable, and your investment lasting longer. When in doubt, always refer to your manual or visit the Graco official support page for more help.