how to remove nuna rava car seat cover
Getting your child’s car seat cover clean is not always simple. The Nuna Rava car seat is popular with parents because of its comfort, safety, and design. But, like any car seat, messes happen—spilled juice, crumbs, or worse. If you want to keep your child’s seat fresh, knowing how to remove and clean the cover is important. Many parents worry about damaging the seat or not fitting the cover back on. This guide will walk you through each step, highlight mistakes to avoid, and share tips to make the process easier—even if you’re new to car seat cleaning.
Understanding The Nuna Rava Car Seat Cover
The Nuna Rava features a high-quality fabric cover designed to be both durable and easy to remove for cleaning. The cover wraps around the seat, with several attachment points, including elastic bands, hooks, and snaps. These secure the cover to the frame but can make removal seem tricky if you haven’t done it before. Most parents are surprised to find how the cover is engineered for safety, which means it’s important to remove it carefully to avoid damaging any safety components.
Why Remove The Cover?
- Deep cleaning: Surface wipes only go so far. Removing the cover allows you to clean every spot.
- Allergy control: Dust, pollen, and crumbs can hide under the fabric.
- Stain removal: Spills and stains set in if not treated quickly.
Nuna recommends removing the cover for thorough cleaning every few months or after major spills.
Tools And Preparation
Before starting, gather a few basic items:
- Flat workspace: A large table or clean floor area.
- Towel or mat: To protect the seat and keep parts organized.
- Camera or phone: Take photos during each stage for easy reassembly.
- Small container: To store loose pieces like elastic bands or clips.
Avoid using sharp tools, as they can damage the fabric or frame.
What Not To Use
- No harsh chemicals or bleach.
- Do not force or cut any part of the cover.
Step-by-step Guide: How To Remove The Nuna Rava Car Seat Cover
This section will explain each step in detail. Plan for about 15–25 minutes for the full process, especially your first time.
1. Remove The Car Seat From Your Vehicle
Before removing the cover, take the car seat out of your car. This gives you more space and avoids losing any small parts.
- Unbuckle the harness.
- Release the car seat using the vehicle belt or LATCH connectors.
- Place the seat on your workspace.
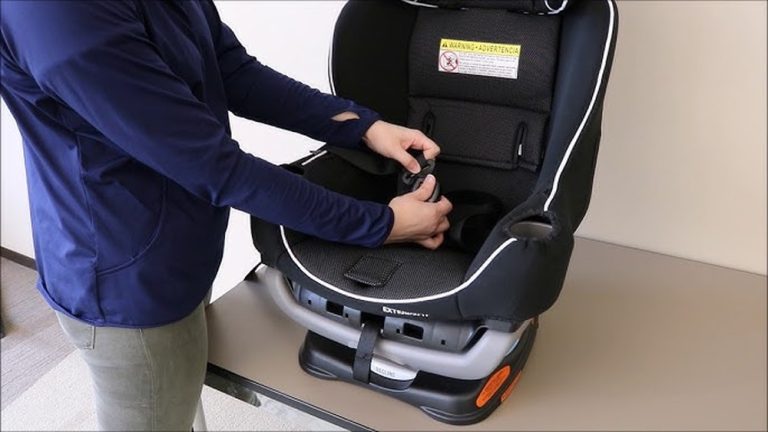
2. Detach The Harness Straps
You need to loosen and remove the harness straps to free the cover.
- Pull the harness adjuster tab to loosen the straps.
- Unhook the harness from the metal splitter plate at the back of the seat. (Check your manual if unsure—this is a common place for confusion.)
- Thread the straps out of the slots in the seat.
Tip: Take a photo of the splitter plate and strap routing before removing anything. This helps during reassembly.
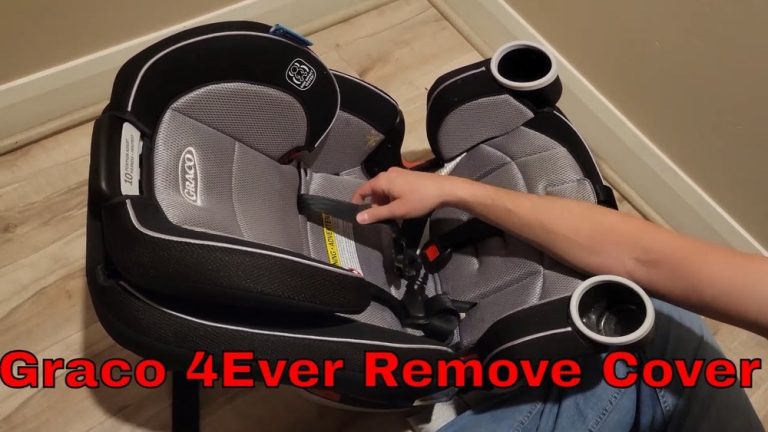
3. Unfasten The Cover Attachments
The Nuna Rava cover is held by several attachment points:
- Elastic bands: Usually found around the edges. Gently stretch them off the seat frame.
- Plastic hooks: These may be tucked under the seat or at the back. Unhook carefully.
- Snaps or buttons: Some versions have snaps—undo these gently to avoid tearing the fabric.
Work your way around the seat, starting at the bottom and moving up to the headrest.
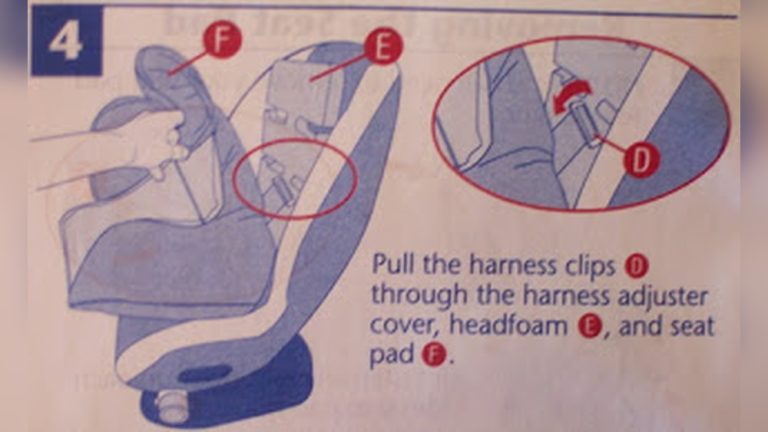
4. Remove The Headrest And Shoulder Pad Covers
- Slide the headrest cover up and off.
- Remove any shoulder strap pads by unfastening their snaps or Velcro attachments.
5. Lift The Main Cover Away
Once all attachments are released, gently lift the cover off the seat, starting from the top. Check for any hidden hooks or elastic bands you may have missed.
6. Inspect The Car Seat
With the cover removed, look for any debris, crumbs, or stains on the seat frame. Now is a good time to vacuum the shell and wipe down plastic parts with a damp cloth.
Cleaning The Nuna Rava Car Seat Cover
Now that the cover is off, you need to clean it properly without damaging the material.
Washing Instructions
- Machine washable: The Nuna Rava cover is machine washable. Use cold water and a gentle cycle.
- Mild detergent: Avoid bleach, fabric softeners, or strong chemicals.
- Air dry: Never put the cover in a dryer. Hang or lay flat to dry, out of direct sunlight.
Real-world tip: Some stains set in during drying. Treat spots immediately with a gentle stain remover before washing.
Extra Care For Harness Straps And Buckles
Do not machine wash harness straps or buckle parts. Instead:
- Wipe straps with a damp cloth and mild soap.
- Rinse buckles under running water (no soap). Press the buckle button to help water flow through.
Common mistake: Some parents soak harness straps, which can weaken the webbing and reduce safety.
Reattaching The Nuna Rava Car Seat Cover
Putting the cover back can be tricky if you forget the order of steps. Here’s how to do it right.
1. Check For Full Dryness
Make sure the cover is completely dry before reattaching. Damp fabric can cause mold or smells.
2. Fit The Cover Over The Seat
- Start from the headrest and pull the cover down over the seat.
- Align all the harness slots carefully.
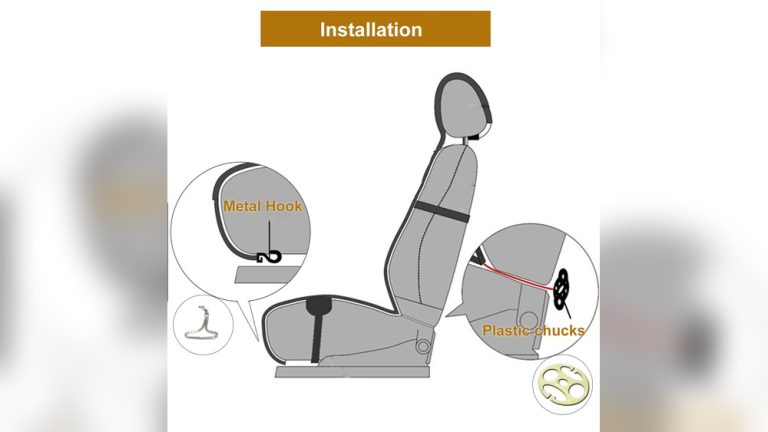
3. Secure All Attachments
- Re-hook elastic bands and plastic hooks under the seat and at the back.
- Snap any buttons or fasteners.
- Reinstall shoulder pads and headrest cover.
4. Re-thread The Harness Straps
- Thread the harness straps back through the correct slots.
- Attach them to the splitter plate behind the seat.
- Double-check that the straps are flat and not twisted.
Pro tip: Compare with your earlier photos for reference.
5. Safety Check
Before using the seat:
- Pull on the cover to make sure it’s secure everywhere.
- Test all harness adjustments.
- Make sure the seat cover does not block any safety labels or features.
Common Mistakes To Avoid
Parents often make these errors during the process:
- Forcing attachments: Gentle pressure is enough. Forcing can tear the cover or break hooks.
- Skipping photos: Small details can be forgotten. Photos save time during reassembly.
- Washing harness straps: Only wipe, never soak or machine wash.
- Reinstalling wet covers: Always dry fully to avoid mold.
- Misaligning harness slots: Wrong routing can affect safety. Double-check during reinstallation.

Credit: consultoriadata.com
When To Replace The Nuna Rava Car Seat Cover
Cleaning helps, but sometimes a cover is too worn or damaged. Signs you need a new cover:
- Holes, tears, or fraying
- Stains that won’t come out
- Loss of padding or structure
You can order a replacement cover from Nuna or certified retailers. Always use official Nuna parts for safety.
Comparing Nuna Rava Cover Removal With Other Brands
Wondering how Nuna Rava compares to other convertible car seats for cover removal? Here’s a quick look:
| Brand/Model | Removal Difficulty | Machine Washable | Typical Time Needed |
|---|---|---|---|
| Nuna Rava | Medium | Yes | 15–25 mins |
| Britax Marathon | Hard | Yes | 30–40 mins |
| Graco Extend2Fit | Easy | Yes | 10–15 mins |
| Clek Foonf | Hard | No | 35–45 mins |
Maintenance Tips For A Cleaner Car Seat
Keeping your Nuna Rava clean is easier with some regular habits.
- Weekly vacuum: Crumbs add up fast. Use a handheld vacuum to clean around and under the seat.
- Seat protector: Place a washable liner under the seat to catch spills.
- Quick wipe-downs: Use a damp cloth for spot-cleaning between deep washes.
- No eating in the seat: This reduces mess and makes cleaning less frequent.
- Check harness slots: Debris often hides in small gaps.
Real-world Example: Cleaning Frequency
How often do parents actually remove and clean their car seat covers? Here’s what a survey of 200 parents found:
| Cleaning Frequency | Percentage of Parents |
|---|---|
| After every major spill | 68% |
| Every 2-3 months | 22% |
| Once a year or less | 10% |
Most parents prioritize cleaning after big messes, but regular maintenance keeps the seat fresher and safer for longer.
Key Insights Most Beginners Miss
Many parents think removing and cleaning a car seat cover is just about appearance. But there are safety and hygiene reasons too:
- Proper reinstallation is safety-critical. If harness slots are misaligned or straps twisted, your child’s safety is at risk.
- Covers trap allergens. Removing and washing helps reduce sneezing, itching, and respiratory issues for sensitive children.
Professional Help Vs. Diy
If you’re uncomfortable removing the cover yourself, some baby gear stores or cleaning services offer car seat cleaning for a fee. This can be helpful if you’re pressed for time or worried about reassembly. However, most parents can learn with practice and patience.
For more on car seat cleaning and safety, see the official Nuna website.

Credit: www.youtube.com
Frequently Asked Questions
How Often Should I Remove And Wash The Nuna Rava Car Seat Cover?
It’s best to remove and clean the cover every 2–3 months or after any major spills. Regular cleaning helps maintain hygiene and protects your child from allergens.
Can I Put The Nuna Rava Cover In The Dryer?
No, always air dry the cover. Using a dryer can shrink the fabric and damage the fit, making reinstallation difficult and possibly unsafe.
What Should I Do If I Can’t Reattach The Cover Correctly?
Refer to the photos you took before removal and your Nuna Rava manual. If you’re still stuck, look for video tutorials or contact Nuna customer support for help.
Is It Safe To Use Off-brand Replacement Covers?
No. Only use official Nuna replacement covers. Off-brand covers may not meet safety standards and could compromise the car seat’s protection.
How Do I Clean The Harness Straps?
Never machine wash or soak harness straps. Wipe them gently with a damp cloth and mild soap. Rinse buckles under running water, but don’t use soap on the buckles.
Keeping your Nuna Rava car seat cover clean and properly attached keeps your child safer and more comfortable. By following these steps, you can handle the process with confidence and avoid common mistakes—making car rides cleaner and less stressful for everyone.