How to Remove a Car Seat Cover: Easy Steps for a Perfect Fit
Removing your car seat cover might seem tricky at first, but it doesn’t have to be. Whether you want to clean up a spill, replace a worn-out cover, or upgrade your car’s interior, knowing how to take off your seat cover correctly is the first step.
If you’re worried about breaking clips or losing screws, don’t be. This guide will walk you through each simple step, helping you avoid common mistakes and get the job done quickly. Stick with me, and you’ll learn how to remove your car seat cover like a pro—saving time, money, and frustration along the way.

Credit: www.seatcoversolutions.com
Tools And Materials Needed
Removing a car seat cover requires a few simple tools and materials. Having these ready makes the process faster and easier. Each tool plays a specific role in safely detaching the cover without damage.
Prepare a clean workspace to keep all parts organized. This helps avoid losing small clips or screws during removal. Gather everything before starting to avoid interruptions.
Basic Tools
You will need a screwdriver, usually flathead or Phillips, to remove screws holding the cover. A trim removal tool or plastic pry tool helps detach clips and plastic parts without scratching. Sometimes, pliers come in handy for pulling out stubborn clips.
Materials For Protection
Use a soft cloth or towel to protect the seat and your car’s interior. Gloves protect your hands from sharp edges or rough fabric. A small container or bag helps keep screws and clips safe during the process.
Optional Items
A flashlight can improve visibility in tight spaces under the seat. A camera or phone lets you take photos during removal to help with reassembly. Patience and care are important materials for this job too.
Locating Fasteners And Clips
Locating fasteners and clips is the first step to removing a car seat cover safely. These small parts keep the cover tightly fixed to the seat frame. Knowing where to find them helps you avoid damage during removal.
Fasteners and clips come in different forms. Some are visible, like screws and bolts. Others hide beneath plastic trim or fabric folds. Finding all of them ensures a smooth process.
Removing Screws And Bolts
Start by checking the seat edges and base for screws or bolts. Use a screwdriver or socket wrench to remove them carefully. Place all screws and bolts in a small container to avoid losing them.
Some screws may hide under plastic covers or fabric flaps. Gently lift these covers to access the fasteners. Avoid forcing anything to prevent breaking clips or tearing fabric.
Prying Off Plastic Trim
Plastic trim pieces often cover hidden fasteners or clips. Use a plastic trim tool or flathead screwdriver to pry them off. Insert the tool gently between the trim and seat frame.
Work slowly around the trim edges to release clips holding it in place. Avoid using too much force to prevent cracking the trim. Keep track of all trim pieces for reassembly.
Identifying Hidden Clips
Hidden clips secure the cover under plastic trim or fabric folds. Feel around the seat edges for small bumps or resistance. These usually mark clip locations.
Use a flat tool or your fingers to unclip them slowly. Clips snap off with gentle pressure. Pulling too hard can tear the fabric or break clips.
Check the seat back and base for these clips. Removing every clip makes lifting the cover easier and safer.
Unfastening The Seat Cover
Unfastening the seat cover is a key step in removing a car seat cover. It requires careful attention to avoid damage. The cover often attaches with straps, Velcro, harnesses, and plastic tabs. Each type of fastener needs a different approach. Taking time here makes the whole process easier and keeps the cover reusable.
Releasing Straps And Velcro
Locate all straps holding the cover in place. These straps usually wrap under the seat. Pull gently to release them from hooks or buckles. Velcro strips stick firmly but peel off slowly. Avoid ripping Velcro too fast to protect the fabric. Check every corner of the seat to find hidden straps or Velcro.
Unthreading Harness Straps
Harness straps often run through the seat cover. Find where the straps enter the cover. Carefully pull the cover away from the harness. Slide the straps out of any slots or holes. Do this slowly to avoid twisting or damaging the harness. Keep track of the strap order for reassembly.
Popping Off Plastic Tabs
Plastic tabs secure parts of the cover tightly. Use your fingers or a flat tool to pry tabs gently. Work around the seat to find all tabs holding the cover. Pop each tab out carefully to avoid breaking it. Some tabs may snap back, so hold the cover steady while releasing them.
Removing The Headrest Cover
The headrest cover is often the trickiest part of removing a car seat cover. It fits tightly around the headrest for a smooth look and secure fit. Removing it requires patience and careful handling to avoid damage.
Start by adjusting the headrest to its highest position. This gives better access to the cover edges. Next, find the seams or zippers that hold the cover in place. Some covers use elastic bands or hooks under the headrest.
Gently pull the cover away from the headrest corners. Avoid pulling too hard to prevent tearing the fabric. Work your way around the headrest, loosening the cover step-by-step.
Lift The Headrest
Pull the headrest up fully from the seat. This frees the cover’s base from the seat frame. Hold the headrest firmly to keep it steady while removing the cover.
Locate And Undo Fasteners
Check for zippers, Velcro strips, or elastic bands on the cover. Open or release these fasteners carefully. This lets the fabric loosen and slide off easier.
Peel The Cover Off
Start peeling the cover at one corner. Work slowly around the headrest. Pull the fabric evenly to avoid stretching or ripping.
Handle The Fabric With Care
Keep the cover clean during removal. Place it on a clean surface to prevent stains. Inspect the fabric for damage before washing or reusing.
Detaching Side And Bottom Covers
Detaching the side and bottom covers of a car seat is a crucial step in removing the entire seat cover. These parts often hold the cover tightly in place. Removing them carefully prevents damage to the fabric and the seat itself.
Start by locating the clips and fasteners that secure the side and bottom covers. These are usually hidden under the seat or beneath the trim. Take your time to find each attachment point to avoid tearing the cover.
Locate Clips And Fasteners
Look under the seat edges for plastic clips or metal hooks. Some covers also use Velcro strips for extra hold. Use a flashlight if the area is dark. Identifying all points helps in detaching the cover smoothly.
Gently Unfasten Side Covers
Use your fingers or a flat tool to release clips carefully. Pull slowly to loosen the side covers without ripping the fabric. Avoid force as it may damage the seat or cover. Work around the edges to free all attachments.
Remove Bottom Cover Securely
Lift the seat bottom slightly to access hidden fasteners. Detach any hooks or straps securing the bottom cover. Some covers may have elastic bands; stretch them gently to remove. Keep all hardware safe for reassembly later.
Handling Different Car Seat Types
Removing a car seat cover varies depending on the seat type. Each car seat has unique features and fasteners. Knowing how to handle different seats helps avoid damage. This guide explains cover removal for three common seat types.
Standard Car Seats
Standard car seats usually have simple covers. Start by sliding the seat forward. Look under the seat for clips or hooks. Use a flat tool to release clips gently. Remove bolts if necessary. Pull the cover carefully from all sides. Avoid tearing the fabric or foam underneath.
Child Safety Seats
Child safety seats have snug, fitted covers. Find all buckles and straps holding the cover. Unclip or unbuckle these carefully. Some covers attach with elastic bands or Velcro strips. Remove these slowly to keep the cover intact. Check the manual for special instructions. Keep all parts for easy reassembly.
Sports Seats
Sports seats often have tight, molded covers. They may use hidden zippers or snap fasteners. Locate these fasteners around the seat edges. Undo fasteners without forcing them open. Sports seats sometimes have foam padding glued to covers. Peel the cover slowly to avoid damage. Store the cover flat to keep its shape.
Tips For Avoiding Damage
Removing a car seat cover requires care to keep the seat and cover intact. Following tips to avoid damage helps save money and effort. Use gentle methods and proper tools to prevent tears or scratches. Take your time and work patiently for best results.
Use The Right Tools
Select tools designed for car interiors. Plastic trim removers work better than metal ones. Avoid sharp tools that may cut the fabric or scratch the seat.
Work Slowly And Gently
Pull covers carefully without force. Rushing can tear the fabric or break clips. Gently loosen fasteners and clips one at a time.
Keep Track Of Clips And Fasteners
Note the location of each clip and fastener. Losing them makes reassembly hard. Use small containers to store screws and hooks safely.
Avoid Using Excessive Force
Do not yank or twist the cover. Excess force can damage stitching or the seat frame. Pause if you meet resistance and reassess the fasteners.
Protect Seat Surfaces
Cover seat parts with a soft cloth before removing covers. This prevents scratches from tools or clips. Always handle plastic parts with care.

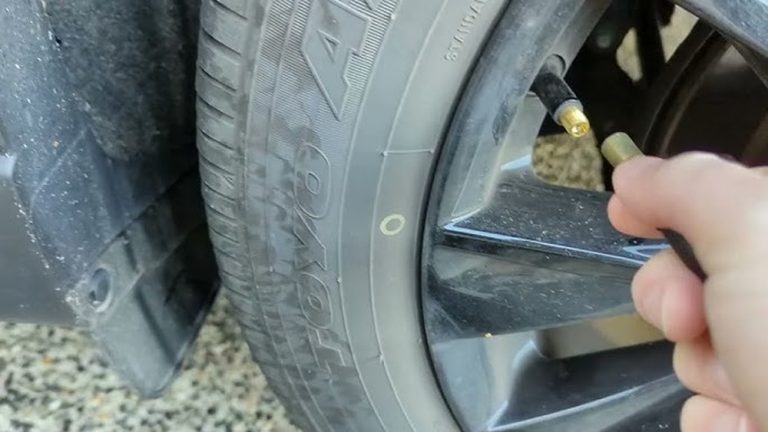
Credit: www.youtube.com
Cleaning And Maintaining Covers
Cleaning and maintaining car seat covers extends their life and keeps them looking fresh. Dirt, spills, and everyday use can quickly wear down the fabric. Regular care prevents stains and odors from setting in. Proper cleaning also helps protect the material from damage and fading. Follow simple steps to keep your covers clean and well-maintained.
Washing Instructions
Remove the cover carefully before washing. Check the care label for specific instructions. Most covers can be machine washed on a gentle cycle. Use cold water to avoid shrinking. Select a mild detergent that is free from bleach. Avoid fabric softeners as they may harm the fabric. For tough stains, pre-treat with a stain remover. Hand wash delicate covers to protect the material. Always secure zippers and fasteners before washing.
Drying And Care Tips
Air drying is the safest method for car seat covers. Hang the cover in a shaded, well-ventilated area. Avoid direct sunlight to prevent fading. Do not use a dryer unless the label allows it. High heat can shrink or damage the fabric. If using a dryer, select a low heat or air fluff setting. Ironing is rarely needed but use a low setting if necessary. Store covers in a clean, dry place when not in use. Regularly vacuum covers to remove dust and debris between washes.
Reassembling The Seat Cover
Reassembling the seat cover is a crucial step after removal. It restores the seat’s look and comfort. Careful reassembly ensures durability and safety. Follow each step to put everything back neatly and firmly.
Reattaching Clips And Straps
Start by aligning the seat cover with the seat frame. Locate all clips and straps you removed earlier. Attach each clip firmly to its matching slot. Pull the straps tight and secure their hooks. Avoid loose fittings that cause wrinkles or slipping.
Securing Screws And Bolts
Replace all screws and bolts removed during disassembly. Use the correct tools to tighten them properly. Check that none are missing or loose. Tight screws keep the cover stable and prevent movement. Do not over-tighten to avoid damage.
Ensuring A Perfect Fit
Smooth out the fabric to remove any wrinkles. Adjust straps and clips to tighten the cover evenly. Sit on the seat to test comfort and fit. Make small tweaks if the cover feels loose or uneven. A perfect fit looks clean and feels comfortable.
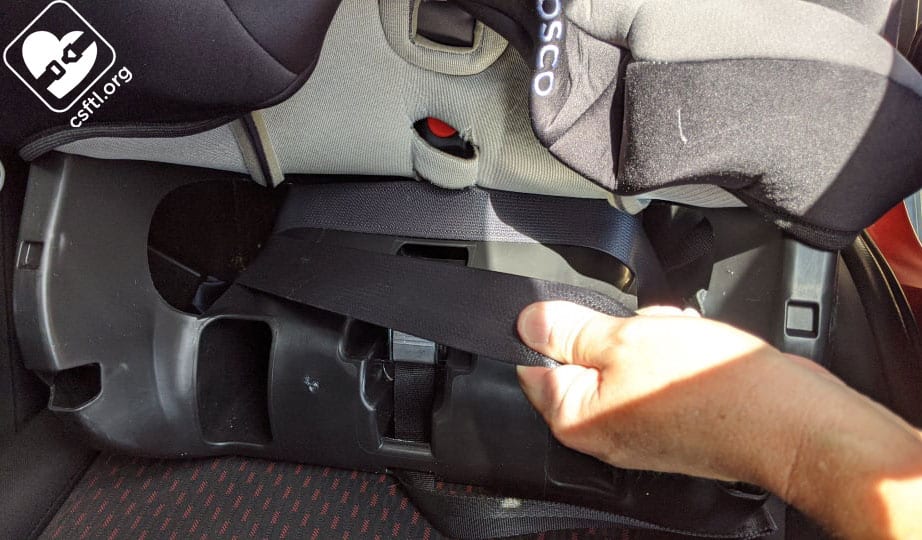
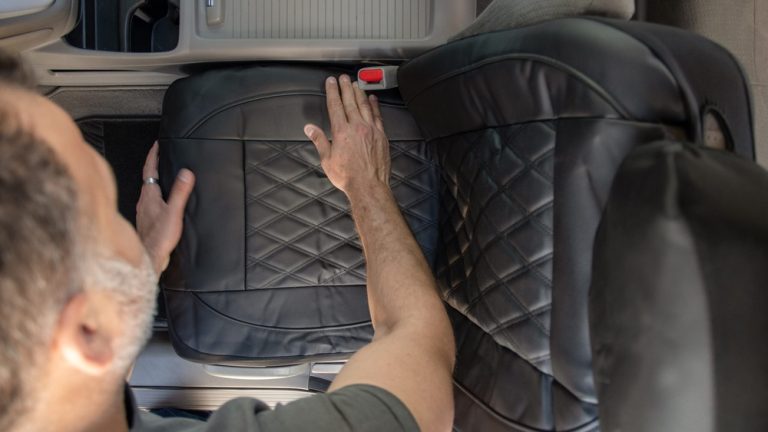
Credit: csftl.org
Frequently Asked Questions
How Do You Remove A Car Seat Cover?
To remove a car seat cover, first detach screws or bolts securing the seat. Pry off plastic trims to access clips. Unclip hooks carefully without tearing fabric. Keep all hardware safe for reassembly. Follow the car seat manual for specific instructions.
Can You Take The Cover Off A Car Seat And Wash It?
Yes, you can remove most car seat covers for washing. Always check the manufacturer’s instructions first. Unfasten clips or hooks gently. Use mild detergent and air dry to avoid damage. Reassemble carefully after cleaning.
How To Take Graco Car Seat Cover Off?
To remove a Graco car seat cover, detach the front cover first. Next, disconnect attachments at the shell’s top. Finally, remove the cover around the level indicator carefully. Keep all clips intact for reassembly. Follow the manual for specific model instructions to avoid damage.
How To Unclip A Car Seat Anchor?
Press the red button on the push-button connector and pull it off the anchor. For J-hook anchors, lift the metal tab, push the hook back, then pull it forward to unclip. Always check your car seat manual for specific steps.
Conclusion
Removing a car seat cover is simple with the right steps. Start by loosening all clips and fasteners carefully. Keep track of screws and small parts to avoid losing them. Take your time to avoid damaging the fabric or seat.
Clean or replace the cover as needed for a fresh look. Following these tips helps maintain your car’s interior easily. Now, you can confidently remove and handle your car seat cover.