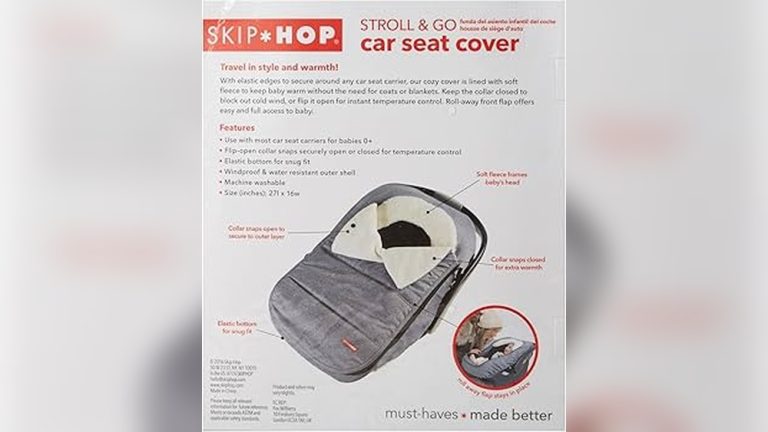
how to remove nuna pipa car seat cover
Getting your Nuna Pipa car seat clean is not just about looks—it’s about your child’s health and comfort. Crumbs, spills, and everyday dirt build up quickly, but removing the Nuna Pipa car seat cover can feel confusing if you’ve never done it before. Maybe you’re worried about damaging the seat, or you just want to make sure you can put it back together easily. Don’t worry—this guide will walk you through every step, with practical tips that make the process smoother. By the end, you’ll be able to remove the cover confidently, clean it well, and reinstall it without stress.
Why Remove The Nuna Pipa Car Seat Cover?
The Nuna Pipa car seat is popular for its safety and style, but it’s also a magnet for messes. Babies and toddlers often spill drinks, drop snacks, or have diaper leaks. Over time, the cover collects bacteria and stains. Removing and washing the cover keeps your child’s space hygienic and extends the life of your car seat.
Some parents try to spot-clean, but this doesn’t remove deep-down dirt or allergens. A full removal lets you reach all the hidden areas. Also, keeping the cover fresh helps keep resale value higher if you plan to pass the seat to another family.
What You Need Before You Start
Before jumping in, gather the right tools to avoid frustration:
- Flat work surface: A clean table or floor to lay out parts.
- Small flat-head screwdriver: Helpful for unclipping tight areas.
- Plastic bag or container: To hold buckles and small pieces.
- Camera or smartphone: Take pictures as you go for easy reassembly.
- Owner’s manual: Always keep it nearby for reference.
Keep these items ready. If you lost your Nuna Pipa manual, you can find a digital copy on the official Nuna website.
Understanding The Nuna Pipa Car Seat Structure
The Nuna Pipa has a smart design, but it’s helpful to know the basic parts before removal:
- Canopy: The sun shade on top.
- Harness straps: The belts that hold your child.
- Buckle and chest clip: Where the straps connect.
- Padding and inserts: Extra comfort for newborns.
- Cover fabric: The main fabric that needs cleaning.
- Plastic shell: The hard safety part underneath.
Many first-time parents miss the small hooks or hidden elastics that secure the cover. Knowing where these are can prevent accidental tears.
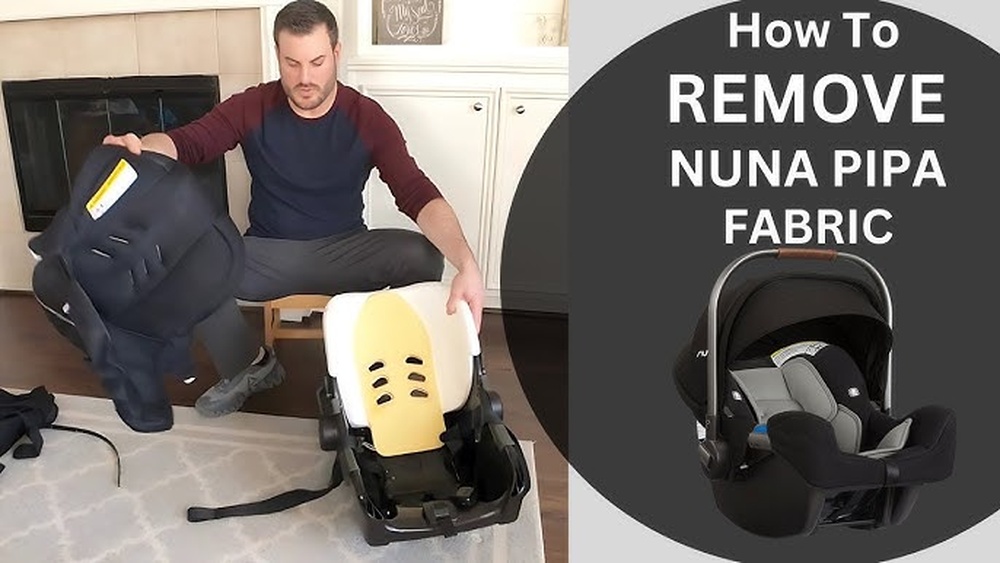
Step-by-step Guide: How To Remove Nuna Pipa Car Seat Cover
1. Remove The Car Seat From The Base
Start with the car seat outside of your vehicle. Press the release button on the back, lift it out, and place it on your flat work surface. This gives you space and control.
2. Take Off The Canopy
Find the canopy attachment points on both sides. Gently unclip or slide out the rods holding the canopy. Set the canopy aside.
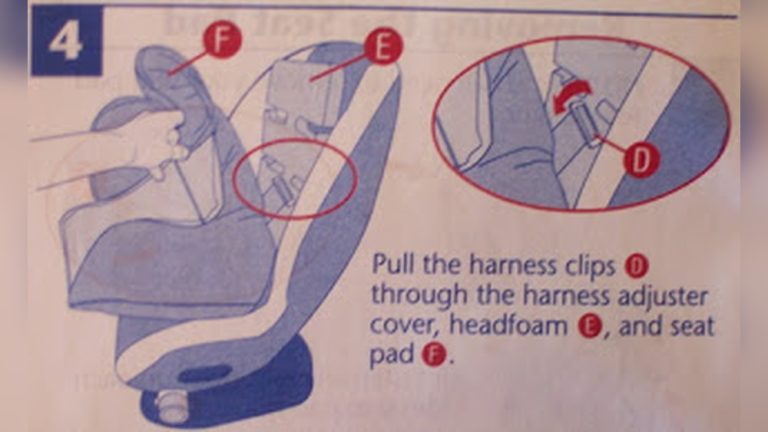
3. Detach The Harness Straps
- Loosen the harness: Pull the harness adjuster strap (usually at the front) to give extra slack.
- Remove shoulder straps: Locate the metal splitter plate at the back of the seat. Slide the harness loops off the plate.
- Unthread from cover: Carefully pull the straps through the slots in the cover. Don’t force them—watch for snags.
A common mistake is pulling the straps too hard, which can fray the webbing or damage the slot.
4. Remove The Buckle
Press the release button and slide the buckle out from the cover slot. Some Nuna Pipa models have a metal clip underneath that needs to be rotated or squeezed to release.
5. Take Out Newborn Inserts And Padding
Remove any extra pads, head supports, or infant inserts. These often attach with Velcro or snap buttons. Place them in your bag or container.
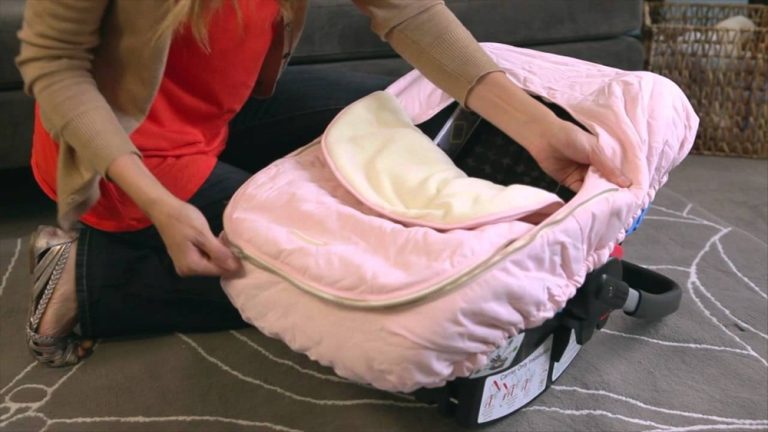
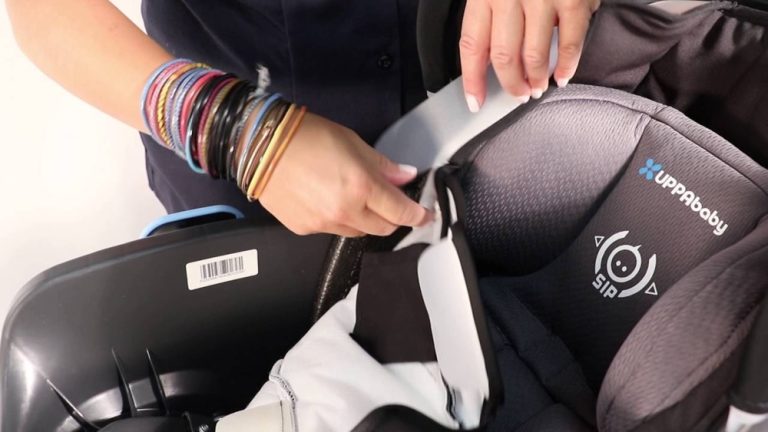
6. Unhook The Cover
Now you can remove the main cover:
- Check for elastic or hooks: The cover is often held by elastic bands or small hooks under the seat.
- Start at the edges: Gently lift the edges of the cover, working your way around.
- Watch for hidden fasteners: Some models have plastic tabs or hidden snaps. Use your flat-head screwdriver if needed, but avoid prying too hard.
Pull the cover off slowly to avoid tearing or stretching it.
7. Check For Remaining Attachments
Before pulling the cover off completely, run your fingers around the seat to make sure nothing is still attached. If something feels stuck, double-check for a missed hook or clip.
8. Set Aside All Parts
Lay out all the pieces on your flat surface. Take a picture so you know the order for reassembly.

Credit: www.youtube.com
Washing The Nuna Pipa Car Seat Cover
Once you’ve removed the cover, you need to clean it properly. Don’t just throw it in the washing machine—Nuna recommends specific steps to avoid damage.
- Read the label: Check the sewn-in washing instructions on the cover.
- Machine wash (if allowed): Use cold water and a gentle cycle. Never use bleach or harsh chemicals.
- Hand wash (if required): Use mild soap and cold water. Scrub gently with a soft brush.
- Air dry: Never put the cover in a dryer. Lay it flat or hang it up to air dry.
If you’re unsure, visit the official Nuna support page for cover care instructions.
Cleaning Buckles And Straps
Wipe the harness straps and buckles with a damp cloth. Do not soak or machine wash them, as water can weaken the webbing or damage the locking mechanism.
Deep Cleaning Tips
- Use a vacuum to remove crumbs from the shell and hard-to-reach areas.
- Spot clean tough stains with a small amount of baby-safe detergent.
- For odors, sprinkle baking soda on the shell, let it sit, then wipe away.
Reinstalling The Nuna Pipa Car Seat Cover
Putting the cover back is just as important as removing it. Here’s how to do it without frustration.
1. Confirm The Cover Is Dry
Ensure the cover is completely dry before reinstallation. Moisture can cause mold or mildew.
2. Fit The Cover Over The Shell
Start at the top and align the cover with the seat’s shape. Pull the edges down and reconnect any hooks, elastics, or tabs.
3. Insert Harness Straps
- Push straps through slots: Feed the harness straps back through the correct slots in the cover.
- Reattach to splitter plate: At the back, loop the straps onto the metal splitter plate.
- Check positioning: Make sure the straps aren’t twisted.
4. Reinstall The Buckle
Slide the buckle through its slot and secure any clips or locks underneath the seat.
5. Add Padding And Inserts
Put back any padding, head supports, or infant inserts in the correct order.
6. Attach The Canopy
Slide the rods or clips back into place at the sides. Ensure the canopy moves smoothly.
7. Final Safety Check
- Tug the harness straps to check they’re secure.
- Check all fasteners, hooks, and elastics.
- Make sure the cover fits snugly and there are no bunches or loose areas.
Take a look at your reference photo to confirm everything matches.
Common Mistakes To Avoid
Many parents make small errors that can affect safety or make cleaning harder. Here’s what to watch out for:
- Skipping the manual: Each Nuna Pipa model may have small differences. Always check your manual.
- Forcing buckles or straps: If something won’t budge, look for a hidden clip or fastener. Forcing parts can break them.
- Washing straps in the machine: This weakens the harness and can void your warranty.
- Drying the cover in a dryer: High heat can shrink or damage the fabric.
- Losing small parts: Always keep buckles, inserts, and clips in a bag while cleaning.
Nuna Pipa Models: Differences In Cover Removal
There are several Nuna Pipa models, and while the steps are similar, some details change. Here’s a quick comparison:
| Model | Buckle Removal | Cover Fastening | Machine Washable |
|---|---|---|---|
| Pipa | Pull-through | Elastic & hooks | Yes (gentle) |
| Pipa Lite | Clip release | Elastic only | Yes (gentle) |
| Pipa RX | Clip and rotate | Hidden snaps | Yes (gentle) |
Always check which model you have for the correct process.
How Often Should You Remove And Wash The Nuna Pipa Cover?
Babies are messy, but frequent washing can cause wear. Most experts recommend:
- Every 1-2 months for regular use
- Immediately after major spills or accidents
- Before storing or reselling
If your child has allergies, more frequent cleaning may help.
Troubleshooting: What If The Cover Won’t Come Off?
Sometimes, the cover feels stuck even after all visible clips are undone. Here’s what to check:
- Hidden tabs: Feel around the bottom for extra fasteners.
- Snagged straps: Make sure all harness parts are free.
- Manual mismatch: Double-check your model and steps.
If you’re still stuck, look for video guides on the official Nuna site or contact their customer service for help.
Professional Cleaning Vs. Diy
Professional cleaning is not usually necessary, but it can help if you have stubborn stains or little time. Compare the two options:
| Option | Cost | Time | Best For |
|---|---|---|---|
| DIY Cleaning | Low (mostly free) | 2–3 hours (including drying) | Regular upkeep |
| Professional | High ($40–$80) | 1–2 days (drop-off/pick-up) | Deep stains, time-saving |
DIY is usually enough if you follow the steps above.
Extra Tips For Success
- Photograph each stage: This is a lifesaver for reassembly.
- Label small parts: Especially if you’re washing several covers at once.
- Keep the manual handy: Print a copy or bookmark the official site.
Two non-obvious insights: First, many parents forget to check under the seat for food or toys, which can cause smells later. Second, always check for recalls or updated cleaning advice, as Nuna sometimes updates their recommendations.
Frequently Asked Questions
How Long Does It Take To Remove And Clean The Nuna Pipa Car Seat Cover?
It usually takes about 20 minutes to remove the cover if it’s your first time. Cleaning and drying can take several hours, depending on your method. Plan for the full process to take up to one day if you need the cover to air dry completely.
Can You Put The Nuna Pipa Cover In The Dryer?
No, you should never put the cover in a dryer. High heat can shrink or damage the fabric, which can make it hard to fit back on and may reduce fire resistance.
Is It Safe To Wash The Harness Straps In The Washing Machine?
No, do not machine wash the harness straps. This can weaken the webbing and affect safety. Wipe them with a damp cloth and mild soap if needed.
What Should I Do If I Lose A Buckle Or Part During Cleaning?
Contact Nuna customer service for replacement parts. Never use the seat if any safety part is missing. You can find contact information on the official Nuna website.
How Do I Know When The Cover Is Dry Enough To Reinstall?
The cover should feel completely dry to the touch—no damp spots or musty smell. Air drying is best, and avoid direct sunlight, which can fade colors.
Caring for your Nuna Pipa car seat cover protects your investment and your child’s health. With the right steps, you’ll keep your car seat looking new and safe for every ride.