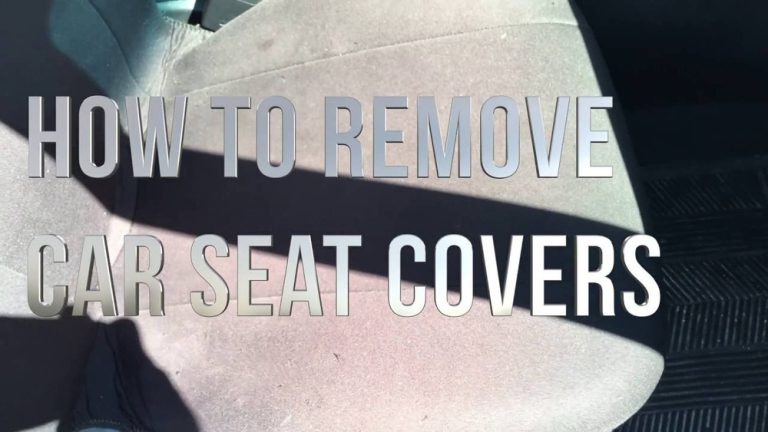
How to Remove Cover from Car Seat: Easy Steps for Perfect Results
You want your car seat to look clean and fresh, but removing the cover might seem tricky at first. Whether you’re tackling a stubborn stain or just giving your seat a thorough wash, knowing how to remove the cover properly is key.
In this guide, you’ll discover simple, step-by-step tips to take off your car seat cover without stress or damage. By the end, you’ll feel confident handling your car seat like a pro—and keep it looking great for every drive. Ready to get started?
Credit: www.swistle.com
Locate Seat Fasteners
Locating the seat fasteners is the first key step to remove a car seat cover safely. These fasteners hold the cover tightly in place. They are often hidden under plastic parts or fabric flaps. Finding all fasteners ensures you can remove the cover without damage. Take your time to check every corner of the seat. Being gentle helps protect the seat material and the fasteners themselves.
Find Hidden Clips And Screws
Look carefully under the seat edges and seams. Clips and screws often hide beneath plastic trims or flaps. Run your fingers along the seat edges to feel for any bumps or hard spots. These usually mark the location of clips or screws. Use a flashlight for better visibility in dark areas. Removing all clips and screws is necessary before pulling off the cover. Missing one can tear the fabric or break the clip.
Use Trim Removal Tools
Trim removal tools make accessing fasteners easier and safer. These tools are flat and thin, designed to pry open plastic parts without damage. Insert the tool gently under plastic covers to lift them. Avoid forcing or twisting too hard to prevent cracks. Using the right tool protects both the seat and your hands. Keep the tools handy to speed up the process and reduce frustration.
Unhook Straps And Velcro
Removing the cover from a car seat starts with unhooking the straps and Velcro. This step frees the cover from the seat’s frame. It also makes the cover easier to lift off without damage. Understanding how the straps and Velcro connect is essential for smooth removal.
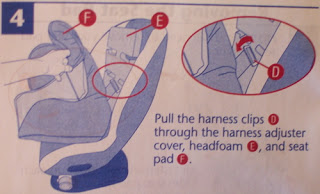
Identify Harness And Attachment Points
Look carefully at the car seat to find all harnesses and attachment points. These are often hidden under folds or fabric layers. Common spots include the back and sides of the seat. The harnesses keep the cover tightly secured. Spotting these points helps avoid tearing the cover or breaking clips.
Some car seats have plastic clips or hooks holding the cover. Others use sewn-in Velcro strips. Knowing the type of attachment makes the removal process faster and safer. Take your time checking every corner.
Release Velcro And Buckles
Start by peeling back any Velcro strips gently. Velcro can be strong, so pull carefully to prevent fabric damage. Next, unbuckle any buckles holding the cover in place. Buckles usually snap open with a simple press or pull.
Keep track of all unhooked straps and buckles as you go. This helps during reassembly. If straps are tangled, straighten them out before continuing. Once all straps and Velcro are released, the cover will come off easily.
Remove Plastic Tabs And Clips
Removing plastic tabs and clips is a key step in taking off a car seat cover. These small parts hold the cover tightly to the seat frame. Removing them carefully helps avoid damage to the cover or seat. Use your hands or a flat tool to gently pop or unclip these fasteners. Work slowly to find all attachment points before pulling the cover away.
Plastic tabs and clips vary by car seat model. Some are hidden under fabric folds or seams. Others are visible along the edges. Identifying each tab and clip allows smooth removal. Missing one can cause tearing or stress on the cover. This section explains how to remove common plastic fasteners safely.
Pop Off Headrest Clips
Headrest clips keep the cover tight around the top of the seat. To pop them off, locate the plastic tabs near the headrest posts. Press or pry gently with a flat tool. They should release with a slight pop. Avoid pulling hard to prevent breaking the clips or tearing fabric. Set clips aside for reassembly later.
Detach Side Cover Tabs
Side cover tabs secure the seat cover along its edges. Look for small plastic hooks or tabs tucked under the fabric. Slide a flat tool between the tab and seat frame. Push or pull the tab until it releases. Work your way along each side carefully. Removing all side tabs frees the cover for complete removal.
Peel Off The Cover
Peeling off a car seat cover requires patience and care. Removing it properly helps avoid damage to both the cover and the seat beneath. The process is simple but must be done step-by-step to ensure smooth removal. Follow the instructions below to peel off the cover safely and effectively.
Start From The Top
Begin peeling the cover at the top of the seat. This area usually has fewer attachments and is easier to lift. Gently pull the fabric upward to loosen it from the seat frame. Avoid pulling too hard to prevent tearing the cover or damaging the seat.
Check for any clips or fasteners holding the cover in place near the headrest. Release these carefully before continuing. This initial step sets the stage for smooth removal of the rest of the cover.
Work Downwards Carefully
After freeing the top, slowly peel the cover downward. Move step-by-step, loosening the fabric as you go. Watch for hidden hooks, zippers, or Velcro strips that might hold the cover tight. Detach these gently to avoid harm.
Take your time and do not rush. Pulling too fast can cause the cover to stretch or rip. Working carefully ensures the cover stays intact and ready for cleaning or replacement.
Prepare Cover For Cleaning
Preparing the car seat cover for cleaning is a crucial step. It helps remove dirt and dust that can damage the fabric during washing. A clean cover lasts longer and keeps your car seat fresh. Follow simple steps to get your cover ready for cleaning.
Shake Out Debris
Start by taking the cover outside. Hold it firmly and shake it well. This removes loose dirt, crumbs, and small debris. Shaking prevents dirt from spreading inside your washing machine or cleaning area. Repeat a few times until no more debris falls out.
Vacuum Crevices
Use a handheld vacuum or a vacuum with a brush attachment. Focus on the folds and seams of the cover. These areas trap dust, pet hair, and crumbs. Vacuuming ensures a thorough clean and prepares the cover for washing. Take your time and be gentle to avoid damaging the fabric.
Secure Harness Straps
If your car seat cover has harness straps, secure them before washing. Coil the straps neatly and fasten them with rubber bands or clips. This stops tangling or damage during the cleaning process. Keeping straps organized makes reassembly easier and safer.
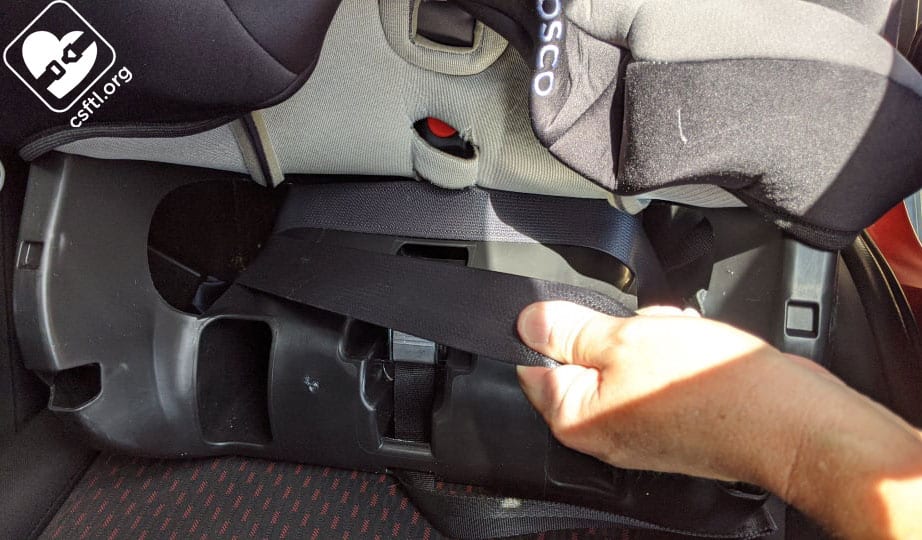
Credit: csftl.org
Machine Wash Tips
Machine washing car seat covers can save time and keep them fresh. Proper care ensures the fabric stays intact and looks good. Follow simple machine wash tips to protect your seat cover and maintain its quality.
Check Manufacturer Instructions
Always read the label or manual before washing. Manufacturers provide specific care details. Some covers need special handling or cannot go in the washer. Following these instructions prevents damage and voiding warranties.
Use Gentle Cycle And Cold Water
Choose a gentle or delicate cycle on your washing machine. Cold water helps avoid shrinking and color fading. It also protects the fabric fibers. Avoid warm or hot water to keep the cover safe and fresh.
Avoid Bleach And Harsh Chemicals
Never use bleach or strong detergents on seat covers. Harsh chemicals weaken fabric and cause discoloration. Use mild, gentle laundry soap instead. This keeps the cover soft and extends its life.
Drying The Cover
After washing your car seat cover, drying it properly is crucial. The drying process helps keep the fabric in good shape and prevents damage. Avoid rushing this step to maintain the cover’s quality and fit.
Air Dry Only
Always dry the car seat cover by air. Lay it flat or hang it in a well-ventilated area. This method stops shrinking and fading. Direct sunlight can fade colors, so choose a shaded spot. Air drying keeps the fabric soft and fresh.
Avoid Heat And Dryers
Do not use a dryer or any heat source. High heat can damage fabric fibers and elastic parts. It may also cause the cover to shrink or warp. Heat weakens the material and shortens its life. Stick to natural air drying for best results.
Special Notes For Child Seats
Removing the cover from a child car seat requires special care. Child seats have safety features that must not be damaged. Cleaning the cover is important, but it should be done carefully. Follow the instructions to keep the seat safe and functional.
Follow Manual Closely
Always read the child seat manual before starting. Manuals have steps specific to each model. They show how to remove covers without harming safety parts. Missing a step can weaken the seat or void its warranty. Take time to follow every instruction exactly.
Some covers have hidden clips or fasteners. The manual helps locate them. It also explains how to handle delicate fabric and padding. Using the manual prevents mistakes and keeps the seat safe for your child.
Never Machine Wash Harness Straps
Harness straps are crucial for your child’s safety. Never put these straps in the washing machine. Machine washing can damage their strength and reduce protection. Instead, clean straps with a damp cloth and mild soap. Avoid soaking or harsh chemicals.
Check the manual for cleaning tips on harness straps. Keeping straps strong is vital. Damaged straps may fail in an accident. Always treat them gently and avoid machine washing to protect your child.
Reinstalling The Cover
Reinstalling the car seat cover requires patience and attention to detail. Proper reinstallation ensures the cover fits snugly and securely. This step helps maintain the seat’s appearance and safety.
Align Cover On Seat Frame
Start by placing the cover over the seat frame carefully. Match the cover’s shape with the seat’s contours. Ensure all holes for seat belts and buckles line up perfectly. Smooth out wrinkles or folds to prevent discomfort. Check that the fabric sits evenly on all sides.
Reconnect Clips And Straps
Locate the clips and straps used to hold the cover in place. Attach each clip firmly to the seat frame’s edges. Pull straps tight and fasten them securely under the seat. Double-check all connections to avoid loose areas. Proper fastening keeps the cover stable during use.

Credit: www.youtube.com
Frequently Asked Questions
How Do You Take A Car Seat Cover Off?
Locate all fasteners or clips under plastic trims or seams. Use a trim tool or fingers to gently loosen and remove the cover. Peel it off carefully from the car seat frame, ensuring no straps or harnesses get tangled.
Can Car Seat Covers Be Removed?
Yes, car seat covers can be removed by peeling them off the seat frame. Locate fasteners under trims, then loosen and lift the cover. Always follow the manufacturer’s instructions for safe removal and cleaning.
Can Car Seat Covers Be Washed In The Washing Machine?
Car seat covers made of fabric usually wash well in a machine on a gentle, cold cycle. Always check the manufacturer’s care label first. Avoid washing harness straps or using hot water and dryers. Air dry covers flat to maintain shape and safety features.
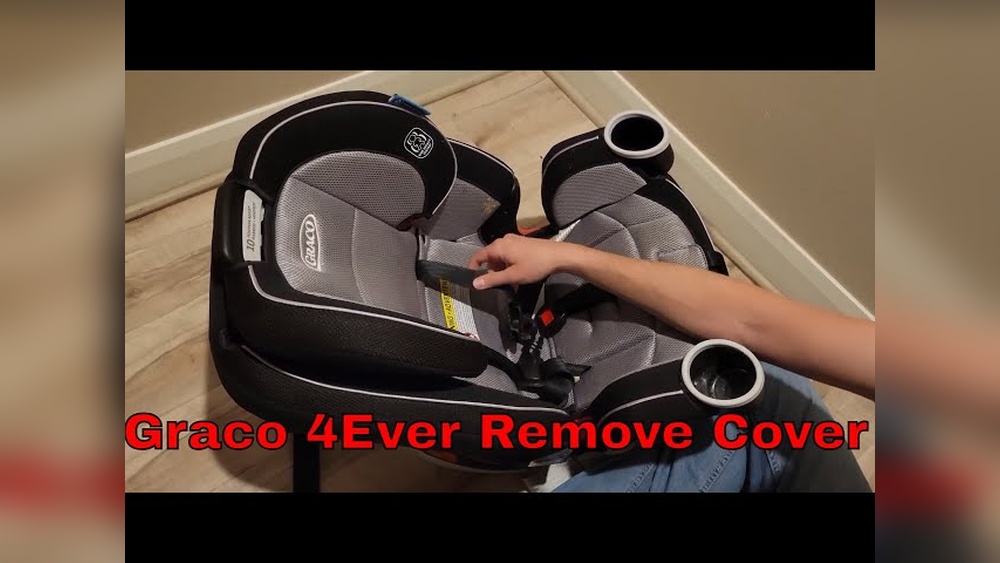
How To Take Graco Car Seat Cover Off?
Unbuckle and loosen all straps securing the Graco car seat cover. Gently peel the cover off the seat frame. Remove harness straps from slots carefully. Follow the manual for specific model instructions to avoid damage.
Conclusion
Removing a car seat cover is simple with the right steps. First, find all fasteners and clips carefully. Use proper tools to avoid damage. Gently peel the cover away from the seat frame. Keep track of straps and parts as you go.
Clean the cover according to its material type. Let the cover dry fully before putting it back. Regular cleaning keeps your car seat fresh and safe. Following these tips makes cover removal easy and quick every time.